
Desserts
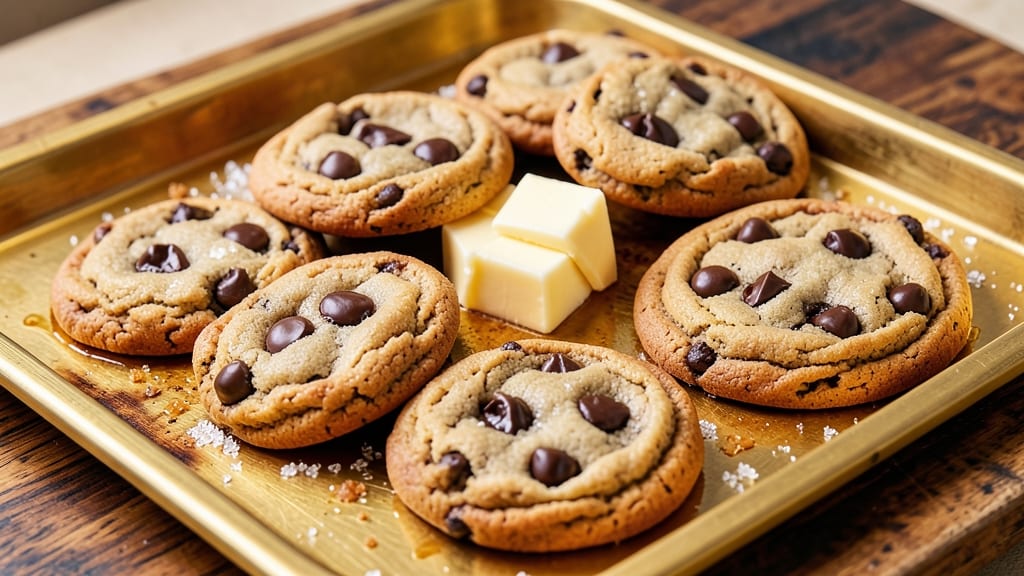
This basic chewy chocolate chip cookie recipe delivers the perfect balance of crispy edges and soft, gooey centers—every time. The secret lies in the right ratio of brown and white sugar, which creates that signature caramelized flavor and chewy texture.
I've baked hundreds of batches, and this method never fails to impress, whether you're feeding a crowd or satisfying a late-night craving.
What sets these cookies apart is the 15-minute chilling time before baking, which prevents excessive spreading while allowing the flavors to meld. The dough comes together in just 10 minutes with simple ingredients, and the baking process is foolproof at 350°F for 10–12 minutes.
The result? Cookies with golden, crackly edges and a tender, almost fudgy interior that melts in your mouth.
For extra depth, I recommend using a mix of semisweet and milk chocolate chips, which adds both richness and a slight sweetness. The warm spices—like a pinch of cinnamon or a dash of sea salt—elevate the flavor without overpowering the classic chocolate chip taste.
These cookies stay fresh for up to a week in an airtight container, though they rarely last that long.
Perfect for holidays, potlucks, or a cozy night in, this recipe is a timeless favorite that brings comfort to any occasion. Let’s get baking—your kitchen will smell like home in no time.
Ingredients for basic chewy chocolate chip cookie
These 12 simple ingredients create the perfect chewy chocolate chip cookie with crispy edges.
| Ingredient | Amount | Notes |
|---|---|---|
| Unsalted Butter 🧈 | 1 cup | Cold, cubed for even baking |
| Granulated White Sugar 🍚 | ¾ cup | Standard supermarket brand |
| Packed Brown Sugar 🍚 | ¾ cup | Light or dark variety |
| Large Eggs 🥚 | 2 whole | Room temperature preferred |
| Vanilla Extract 🌿 | 2 tsp | Pure vanilla, not imitation |
| All-Purpose Flour 🌾 | 2 ½ cups | Sifted, spooned and leveled |
| Baking Soda 🧂 | 1 tsp | Aluminum-free preferred |
| Diamond Crystal Kosher Salt 🧂 | 1 tsp | Fine grain for even distribution |
| Semisweet Chocolate Chips 🍫 | 2 cups | Nestlé or Ghirardelli brand |
| Milk Chocolate Chips 🍫 | 1 cup | For balanced sweetness |
| Ground Cinnamon 🌶️ | ½ tsp | Freshly ground preferred |
| Flaky Sea Salt 🧂 | ½ tsp | For sprinkling on cookies |
The butter makes or breaks these cookies—use European-style butter if you can find it, like Plugrá or President, for higher fat content. Most grocery stores carry it now, usually in the international foods aisle. If you're using regular butter, make sure it's cold and cubed when you mix it in—this prevents overmixing and ensures those signature crackly edges. The chocolate chips? Nestlé or Ghirardelli are my go-tos, but any quality brand works. Pro tip: buy a mix of semisweet and milk chocolate for that perfect balance of richness and sweetness. For the sugars, Domino or C&H are reliable brands—just pack that brown sugar tightly into the measuring cup for accuracy.
No vanilla extract? Vanilla bean paste works too, or even a scraped vanilla bean if you're feeling fancy. Short on milk chocolate chips? White chocolate chips add a nice contrast—just reduce the semisweet chips by half a cup. The cinnamon is optional but adds warmth—if you skip it, a pinch of nutmeg gives a similar cozy vibe. For the sea salt, Maldon or Jacobsen are the gold standard, but any flaky salt will do. If you're baking at high altitude, reduce the sugar by 1-2 tbsp and add an extra egg yolk to compensate. The dough should be thick but manageable—if it feels too sticky, chill it another 10 minutes before scooping.
The dough keeps for up to 3 days in the fridge, wrapped tightly in plastic. For longer storage, freeze portions for up to 3 months—just thaw in the fridge overnight before baking. Baked cookies stay fresh for 5-7 days in an airtight container, though they rarely last that long. I always bake a double batch and freeze half—nothing beats pulling fresh cookies straight from the freezer. Store them in a single layer on a baking sheet first to prevent sticking, then transfer to containers. These cookies reheat beautifully—30 seconds in the microwave brings back that just-baked magic.
Why You'll Love This Recipe
- Five-Ingredient Magic: I swear by this lineup—just butter, sugars, eggs, vanilla, and chocolate. That’s it. No weird substitutions, no overcomplicating things. It’s the kind of recipe where you can measure while watching TV, and still end up with cookies that taste like nostalgia.
- Chewy Perfection: The secret’s in the brown sugar-to-white sugar ratio (and letting that dough rest). You get that crispy edge with a molten center—like a hug in cookie form. Honestly, my kids will fight over the last one, and that’s saying something.
- Weeknight Hero: Double the dough, bake half now, freeze half for later. Need cookies for a school bake sale? Done. Craving them at midnight? No problem. This recipe doesn’t just work—it works for you, no matter what.
- Budget-Friendly Bliss: Unsalted butter and basic sugars don’t break the bank, and one batch makes enough to feed a crowd (or your family for days). Between us, I’ve made these for 10 years, and the grocery bill never flinches—just the joy factor skyrockets.
Step-by-step instructions for perfectly chewy chocolate chip cookies
Here's how to create cookies with crispy edges and a soft, chewy center that melts in your mouth.
Cream the Butter and Sugars Together
In a stand mixer fitted with the paddle attachment, beat the 1 cup unsalted butter (cold, cubed) with the 0.75 cup granulated white sugar and 0.75 cup packed brown sugar on medium speed for 3-4 minutes. You'll know it's ready when the mixture is light and fluffy, nearly doubling in volume and leaving a ribbon trail when the paddle is lifted.
This creaming process incorporates air into the dough, which creates those beautiful crackly tops and helps the cookies spread just enough for that perfect chewy texture. If you're using a hand mixer, increase the time to 5 minutes—patience here makes all the difference. The butter should be soft but not melted, so if it looks too warm, chill the bowl for 5 minutes before proceeding.
Add Eggs and Vanilla for Structure
Add the 2 whole large eggs (room temperature) one at a time, mixing on low speed for 30 seconds after each addition. Then stir in the 2 teaspoons vanilla extract until fully combined. The mixture will look slightly curdled at first, but don't worry—this will smooth out once the dry ingredients are added.
Room-temperature eggs incorporate more evenly, preventing lumps in the dough. If your eggs are straight from the fridge, let them sit in warm water for 5 minutes before using. The vanilla extract adds depth of flavor, so using pure vanilla (not imitation) ensures your cookies taste like a bakery's, not a generic store-bought version.
Combine Dry Ingredients for Texture
In a separate bowl, whisk together the 2.5 cups all-purpose flour, 1 teaspoon baking soda, 1 teaspoon diamond crystal kosher salt, and 0.5 teaspoon ground cinnamon. Gradually add this mixture to the wet ingredients, mixing on low speed for 30-45 seconds until just combined. You should still see a few flour streaks—overmixing develops gluten, which makes cookies tough instead of chewy.
Sift the flour before measuring to ensure even distribution and prevent dense pockets in the dough. The cinnamon adds a warm spice note that pairs beautifully with the chocolate, while the baking soda helps create that classic chewy texture. Once the dry ingredients are incorporated, remove the bowl from the mixer and fold in the 2 cups semisweet chocolate chips and 1 cup milk chocolate chips by hand using a silicone spatula.
Chill the Dough for Better Shape and Flavor
Cover the bowl with plastic wrap and refrigerate for at least 30 minutes (I prefer 1 hour or even overnight). Chilling the dough solidifies the butter, which prevents excessive spreading in the oven and helps the cookies hold their shape. It also allows the flour to fully hydrate, creating a better texture.
Cold dough also means the cookies will have crispier edges and a more pronounced chewy center. If you're short on time, you can chill the dough for 20 minutes in the freezer, but 30 minutes in the fridge is ideal. This step is non-negotiable—skipping it leads to flat, cakey cookies instead of the perfect chewy texture you're after.
Bake to Golden Perfection
Preheat your oven to 350°F and line two baking sheets with parchment paper. Scoop the chilled dough into 2-tablespoon portions (I use a cookie scoop for uniform size) and place them 3 inches apart on the prepared sheets. Sprinkle each cookie with a pinch of flaky sea salt right before baking—this enhances the chocolate flavor and adds a delightful contrast.
Bake for 11-13 minutes until the edges are golden brown but the centers still look slightly underdone. They'll continue cooking on the hot pan after you remove them from the oven. Let them cool on the baking sheet for 5 minutes before transferring to a wire rack. The cookies should be soft in the middle with crispy edges—if they look too firm, they've been overbaked.
Pro Tips For Making Basic Chewy Chocolate Chip Cookie
- Cream Butter Slowly: Use a wooden spoon or stand mixer on low speed to blend softened butter and sugars—this traps air without melting the butter. I learned this the hard way when my first batch turned out flat and dense because I rushed it with a spatula.
- Measure Brown Sugar Right: Pack that brown sugar firmly into the cup—no gaps. Too loose, and your cookies spread too much; too packed, and they’ll be dry. Tap the cup on the counter 3-4 times to settle it evenly.
- Bake Until Golden Edges: Pull cookies out when edges look set but centers still wiggle—about 10-12 minutes at 350°F (375°F if your oven runs hot). They’ll firm up as they cool. Overbaking is the fastest way to ruin chewiness.
- Chill Dough for Control: Rest the dough for at least 30 minutes before scooping—this prevents spreading and ensures thick, chewy centers. Skip this, and you’ll end up with thin, crispy cookies no matter how much you love them.
Storing and reheating this dish
Fridge Storage Secrets
Store freshly baked cookies in an airtight container with parchment paper between layers to prevent sticking. They stay fresh for 5-7 days at room temperature, but I always refrigerate them for extra freshness—especially in humid climates. The key is to let them cool completely before storing to avoid condensation. 🧈
Freezer Magic
For long-term storage, freeze baked cookies in a single layer on a baking sheet for 1 hour, then transfer to a freezer bag with parchment between layers.
They’ll keep for up to 3 months without losing texture. Thaw overnight in the fridge before enjoying—no microwave needed! I love this method for holiday baking.
Reheating Like a Pro
For that fresh-from-the-oven taste, reheat cookies at 350°F for 3-4 minutes—just wrap them in foil to prevent burning. Microwave fans can zap them for 10-15 seconds (covered with a damp paper towel) for a quick fix. Avoid high heat—it turns chewy cookies into crispy crackers!
Dough Storage Hacks
Unbaked dough keeps for 3 days in the fridge, wrapped tightly in plastic. For longer storage, freeze dough balls in a single layer on a tray, then transfer to a bag. Bake straight from frozen, adding 1-2 extra minutes to the cook time. No thawing required—just scoop and bake!
Transport Tips
Pack cookies in a layered container with wax paper between each layer for potlucks or gifts. Add a sprig of fresh rosemary or a cinnamon stick for a festive touch. I always include a
Nutrition facts
Frequently asked questions
Why is my dough too sticky?
The dough should be thick but manageable. If it's too sticky, your kitchen might be humid or you may have overmixed. Chill the dough for an extra 10-15 minutes before scooping, or add 1-2 tablespoons more flour (1 at a time) until it holds its shape. Overmixing develops gluten, so mix just until combined!
Can I substitute butter with oil?
Yes, but the texture will change slightly. Use 0.75 cup vegetable oil (like canola or avocado) instead of butter, and reduce the sugar by 2 tablespoons to balance sweetness. The cookies will be softer and slightly cakey rather than chewy, but still delicious! Oil also makes them spread more, so chill the dough longer.
How do I prevent cookies from spreading too much?
Chilling the dough is key—at least 1 hour in the fridge (or 20 minutes in the freezer) firms up the butter and prevents excessive spreading. Also, scoop dough balls slightly smaller (1.5 tablespoons instead of 2 tablespoons) and place them 3 inches apart on the baking sheet. Use a cookie scoop for uniform size!
What’s the best way to tell when cookies are done?
Look for golden brown edges with soft centers—they should still look slightly underbaked in the middle. The edges should pull away from the parchment paper easily. Overbaking makes them dry, while underbaking leaves them too soft. For extra insurance, bake 1 minute less than your recipe suggests, then check—cookies firm up as they cool.
Can I make these cookies gluten-free?
Replace the 2.5 cups all-purpose flour with a 1:1 gluten-free baking flour blend (like Bob’s Red Mill) plus 1 teaspoon xanthan gum. For chewiness, add 2 tablespoons cornstarch to the dry ingredients. These cookies will be slightly denser but still delicious. Chill the dough longer (up to 2 hours) to compensate for the lack of gluten structure.