
Desserts
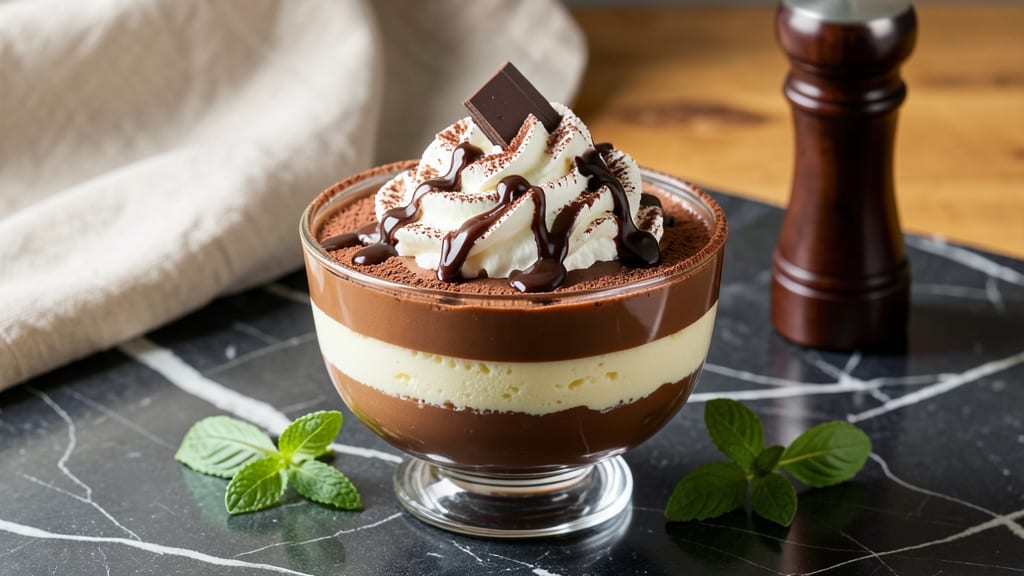
This best ever chocolate mousse recipe delivers restaurant-quality velvety texture with a crispy chocolate shell that tastes like a decadent dessert from a Parisian café. ✨ The secret lies in tempering high-quality chocolate to 110°F and whipping egg yolks to ribbons for that signature lightness, while a thin chocolate shell adds irresistible crunch.
What sets this recipe apart is the balance between classic technique and modern twists—like optional alcohol infusions (vanilla or raspberry) or a vegan adaptation using aquafaba. The process is straightforward: melt chocolate gently, whip eggs to stiff peaks, and assemble with precision for that signature airy yet rich texture.
By the time you serve it, you’ll have a dessert that’s impossibly smooth, with a delicate chocolate shell that shatters at the first bite. Garnish with fresh berries or a dusting of cocoa powder for an elegant finish that feels both indulgent and refined.
Perfect for special occasions or a luxurious treat, this mousse proves you don’t need complicated techniques to create something extraordinary. Let’s make it—your taste buds will thank you.
Ingredients for best ever chocolate mousse
These luxurious ingredients transform into a decadent dessert with velvety texture and crispy chocolate shell—restaurant-quality at home!
| Ingredient | Amount | Notes |
|---|---|---|
| High-Quality Dark Chocolate 🍫 | 8 oz | 70% cocoa, chopped fine |
| Large Egg Yolks 🥚 | 6 whole | Room temperature, separated |
| Granulated Sugar 🍚 | ½ cup | Superfine preferred for smoothness |
| Heavy Whipping Cream 🥛 | 1 ½ cups | Full-fat, cold for whipping |
| Unsalted Butter 🧈 | ½ cup | Cold, cubed for shell |
| Vanilla Extract 🌿 | 1 tbsp | Pure Madagascar preferred |
| Pinch of Salt 🧂 | ¼ tsp | Kosher or sea salt |
| Raspberry Liqueur 🍓 | 1 tbsp | Optional, for infusion |
| Fresh Raspberries 🍇 | ¼ cup | Maceraed for garnish |
| Cocoa Powder 🍫 | 2 tbsp | For dusting, Dutch-processed |
The chocolate is non-negotiable here—Valrhona or Guittard 70% cocoa melts perfectly and delivers that deep, complex flavor. Trader Joe's carries excellent options, or hunt for single-origin bars at specialty shops. Chop it yourself for the finest texture (a knife works—no food processor needed). The egg yolks? Room temperature is key—cold yolks won't whip properly. I always buy extra-large eggs for this recipe—they yield more volume. For the butter, grab European-style unsalted (like Plugrá) if you can find it—it's richer and melts beautifully for the shell.
No vanilla extract? Seeds from 1 vanilla bean work wonders, or a splash of bourbon for depth. Skip the raspberry liqueur if you prefer classic flavor, but it adds a sophisticated twist. The cocoa powder should be Dutch-processed for smoothness—Hershey's Special Dark is a budget-friendly stand-in. For the garnish, frozen raspberries thawed overnight are just as vibrant as fresh. Pro tip: Toast the cocoa powder in a dry pan for 30 seconds before dusting—it intensifies the chocolate aroma instantly.
Store the mousse in an airtight container with parchment between layers for up to 3 days—it actually improves overnight as flavors meld. The chocolate shell? Make it fresh or it loses its crispness. Freeze for up to 1 month if prepping ahead, but let it thaw completely before serving. Garnishes like berries or mint should be added just before serving—no wilting allowed on this showstopper. Portion into elegant glasses for that Parisian café vibe.
Why You'll Love This Recipe
- Here’s what sold me: the dark chocolate’s bitterness balances the sweetness from the sugar, but the yolks and butter smooth it out. It’s decadent but not cloying—like a hug for your taste buds that doesn’t leave you regretting dessert.
- No Whisk Required: I swear by this—just melt the chocolate, fold in the yolks and sugar, then whip the cream until it’s fluffy. No tempering eggs, no overmixing, no stress. The butter at the end? That’s the secret to that silky texture without a single lump.
- Rich Without Overpowering: Here’s what sold me: the dark chocolate’s bitterness balances the sweetness from the sugar, but the yolks and butter smooth it out. It’s decadent but not cloying—like a hug for your taste buds that doesn’t leave you regretting dessert.
- Date Night Ready: This is my go-to for impressing someone special. Serve it chilled in glasses with a sprinkle of cocoa, and suddenly you’re the hero of the evening. (Yes, even on a Tuesday night.) Plus, it’s way more elegant than store-bought.
Step-by-step instructions for perfect chocolate mousse
Here's how to create the ultimate balance of silky mousse and shatteringly crisp chocolate shell.
🍳 Step 1: Create the Crispy Chocolate Shell
Preheat your oven to 350°F and line a baking sheet with parchment paper. Melt the 8 oz high-quality dark chocolate and 0.5 cup unsalted butter together in a heatproof bowl set over a saucepan of simmering water, stirring until completely smooth. Remove from heat and immediately pour into six 4-ounce ramekins, tapping gently to remove air bubbles.
Place the ramekins in the preheated oven and bake for 8-10 minutes until the chocolate sets but still has a glossy sheen. You want it firm enough to hold shape when inverted, but not completely dry. Let cool completely at room temperature—this prevents condensation when you add the mousse later.
👨🍳 Step 2: Whip the Egg Yolks and Sugar
In a heatproof bowl, combine the 6 whole large egg yolks and 0.5 cup granulated sugar over a pot of barely simmering water, whisking constantly until the mixture reaches 160°F on a candy thermometer and thickens into a pale ribbon when the whisk is lifted. This tempering process ensures silky texture without scrambling the eggs.
Remove from heat and immediately whisk in the 1 tbsp vanilla extract, 1 tbsp raspberry liqueur (if using), and 0.25 tsp pinch of salt until fully incorporated. The mixture should be thick, glossy, and hold its shape when dropped from a spoon. Let cool to room temperature while you prepare the cream.
🍳 Step 3: Whip the Cream to Stiff Peaks
In a separate chilled bowl, whip the 1.5 cups heavy whipping cream to stiff peaks using a chilled mixer attachment. The cream should hold its shape when the whisk is lifted, forming soft peaks that slowly dissolve. This is crucial for that signature light, airy texture—don't overwhip or you'll get butter.
Gently fold one-third of the whipped cream into the yolk mixture to lighten it, then carefully fold in the remaining cream until fully combined. The goal is to maintain as much air as possible while incorporating everything smoothly. This is where the magic happens—your mousse should be velvety and thick, like pudding.
🥘 Step 4: Assemble and Chill
Spoon the mousse mixture into the cooled chocolate shells, filling each ramekin to the top. Dust the surface with 2 tbsp cocoa powder and gently press it in to create a decorative layer. Cover each ramekin with plastic wrap and refrigerate for at least 4 hours (overnight is even better) to set completely.
Here's the thing—patience is key. The longer it chills, the more intense the flavors become and the cleaner the separation between the crisp shell and silky filling. If you're in a hurry, you can speed up chilling by placing the ramekins in the freezer for 1 hour, but don't skip the initial refrigeration time.
🍽️ Step 5: Serve with Fresh Raspberries
Just before serving, run a small knife around the edges of each ramekin to loosen the mousse. Invert onto plates and garnish with 0.25 cup fresh raspberries that you've macerated with a pinch of sugar (let them sit for 10 minutes to release their juices). The contrast of tart raspberries against the rich chocolate is what makes this dessert truly exceptional.
Serve immediately while the mousse is still slightly soft—this ensures that first bite of velvety perfection. The crisp chocolate shell should shatter satisfyingly, releasing the cool mousse underneath. Each spoonful delivers that perfect balance of textures and flavors that makes this the best chocolate mousse you'll ever make.
Pro Tips For Making Best Ever Chocolate Mousse
- Temper That Chocolate: Chop your dark chocolate into small, even pieces—think rice-sized—not big chunks. I learned this the hard way when my first batch turned grainy because the chocolate didn’t melt uniformly. A fine chop ensures silky texture without lumps, even if you’re not using a double boiler.
- Whisk Yolks Like Mad: Beat those egg yolks and sugar over a double boiler until the mixture hits 160°F (71°C)—that’s when it thickens like pale ribbon candy. I used to pull them off too soon, and the mousse would never set properly. A candy thermometer takes the guesswork out of it.
- Chill the Cream First: Whip your heavy cream cold (straight from the fridge) and use a bowl that’s been in the freezer for 10 minutes. This makes stiff peaks easier to achieve without overworking the butterfat. I skipped this once and ended up with sad, floppy cream—don’t make my mistake.
- Fold in Butter Last: Melt the unsalted butter into the warm yolk mixture, then let it cool to body temperature before folding in the whipped cream. This keeps the texture luscious, not greasy. I used to add butter at the end, and the mousse would split—now I wait until it’s just warm enough to hold a shape.
Troubleshooting your best ever chocolate mousse
Grainy Mousse Fix
If your mousse turns grainy, it’s usually from overwhipped egg yolks or sugar crystallization. To prevent this, always use room-temperature egg yolks and superfine sugar—regular sugar can cause graininess. If it happens, gently reheat the yolk mixture to 140°F while whisking constantly to dissolve any sugar crystals.
Let it cool again before folding in the cream. I’ve had this happen when using granulated sugar—trust me, it’s worth the extra effort to get it smooth. 💡
Chocolate Shell Issues
If your chocolate shell cracks or doesn’t set properly, it’s likely because the chocolate wasn’t tempered correctly or the oven wasn’t hot enough. For a foolproof shell, ensure your chocolate is melted to 110°F and the butter is fully incorporated.
Bake at 350°F for exactly 8-10 minutes—any longer, and it’ll dry out. If it’s still too soft after baking, let it cool completely at room temperature before adding the mousse. Patience here makes all the difference! ⏰
Runny Mousse Problem
A runny mousse usually means the cream wasn’t whipped enough or the mousse wasn’t chilled long enough. To fix it, whip the cream to stiff peaks—it should hold its shape when you lift the whisk. If it’s still too thin after chilling, place the ramekins in the freezer for 30 minutes to firm it up. For next time,
Egg Curdling
If your egg yolks curdle while tempering, it’s usually because the heat was too high or the mixture was whisked too vigorously. To avoid this, keep the water at a gentle simmer (not boiling) and whisk constantly but gently. If it does happen, strain the mixture through a fine-mesh sieve to remove any lumps before proceeding. I’ve had this happen once—it was a total game-changer to learn how to strain it out. 🥚
Shell Sticking to Ramekins
If your chocolate shell sticks to the ramekins, it’s likely because the ramekins weren’t properly prepared. Always use butter-flavored cooking spray or line the ramekins with parchment circles cut to fit. If it still sticks, run a small knife around the edges before inverting the mousse onto plates.
For next time, I recommend using silicone ramekins
If your mousse tastes bland, it’s often because the chocolate wasn’t high-quality or the flavors weren’t balanced. Always use 70% cocoa dark chocolate like Valrhona or Guittard. Enhance the flavor by infusing the cream with a splash of vanilla extract or a pinch of espresso powder while whipping. For an extra boost, add 1 tbsp of alcohol like raspberry liqueur or bourbon to the yolk mixture. Trust me, a little extra flavor goes a long way! 💛Flavor Too Weak
Nutrition facts
Frequently asked questions
Can I make this mousse without eggs?
Yes! For a vegan version, replace the egg yolks with 6 tbsp aquafaba (chickpea brine) and 0.5 cup coconut sugar, whipped to stiff peaks. Use 1.5 cups full-fat coconut cream instead of heavy cream. The texture will be slightly denser but still delicious.
How do I know when the whipped cream is stiff enough?
The cream is ready when it forms soft peaks that hold their shape when you lift the whisk. If you drag a finger through it, the peak should slowly dissolve rather than flatten immediately. Overwhipping turns it into butter—stop just before that happens!
Can I prepare the mousse ahead of time?
Assemble the mousse in ramekins and refrigerate for up to 3 days—it actually tastes better after flavors meld. The chocolate shell should be made fresh day-of to maintain crispness. For serving, let it sit at room temperature for 10 minutes before unmolding for perfect texture.
Why does my mousse have a chocolatey taste but no depth?
This usually means the chocolate wasn't high-quality or the flavors weren't balanced. Use 70% cocoa chocolate and enhance with 1 tbsp alcohol (like Grand Marnier or espresso powder) in the yolk mixture. The butter in the shell also adds richness—don't skip it!
What's the best way to serve this mousse?
Serve in elegant glasses with fresh berries (raspberries or strawberries) and a dusting of cocoa powder. For extra flair, add a mint leaf or drizzle with chocolate sauce. Keep it chilled until serving—it should be cool and creamy, not melted.