
Desserts
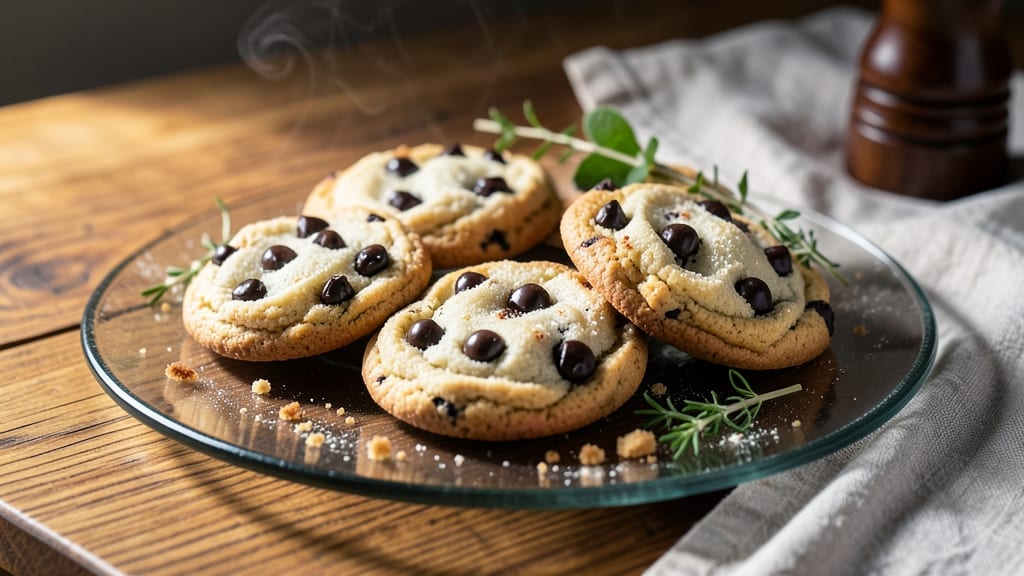
This black and white chocolate chip cookie recipe delivers the perfect balance of rich dark chocolate crunch and creamy milk chocolate melt—every bite is a study in contrast. 🔥 The secret lies in using both chocolate types separately: dark chocolate chunks for bold, bitter depth and milk chocolate chips for familiar sweetness.
I’ve baked these dozens of times, adjusting for the ideal texture—crispy edges that give way to a chewy center, with pockets of gooey chocolate in every bite.
The process is straightforward but precise: cream butter and sugars until light, fold in eggs, then alternate dry ingredients with a splash of vanilla. The dough must be thick but scoopable—press it into balls, then chill for 30 minutes to prevent spreading.
Bake at 350°F for 10–12 minutes until golden, but watch closely—they go from perfect to overdone fast.
What you’ll end up with is a tray of cookies that look stunning with their contrasting chocolate flecks and taste even better. The dark chocolate adds a sophisticated edge, while the milk chocolate keeps it familiar and comforting.
These cookies stay fresh for days, making them perfect for baking ahead or gifting.
For extra indulgence, try adding a pinch of sea salt to the dough or swapping half the milk chocolate for white chocolate chips. The possibilities are endless, but the foundation—this simple, foolproof method—never fails. Let’s get baking!
Ingredients for black and white chocolate chip cookie
Contrasting chocolates and precise measurements—this is where cookie magic happens.
| Ingredient | Amount | Notes |
|---|---|---|
| Unsalted Butter 🧈 | 1 cup | Cold, cut into 1-inch cubes |
| Granulated Sugar 🍚 | ¾ cup | Superfine preferred for smooth texture |
| Packed Brown Sugar 🍚 | ¾ cup | Light or dark, packed tightly |
| Large Eggs 🥚 | 2 whole | Room temperature for even mixing |
| Pure Vanilla Extract 🌿 | 2 tsp | High-quality, no imitation |
| All-Purpose Flour 🌾 | 3 cups | Sifted, spooned and leveled |
| Baking Soda 🧂 | 1 tsp | Freshly measured, not baking powder |
| Diamond Crystal Kosher Salt 🧂 | ½ tsp | Fine grain, not table salt |
| Dark Chocolate Chunks 🍫 | 1 ½ cups | 70% cacao, roughly chopped |
| Milk Chocolate Chips 🍫 | 1 ½ cups | Enjoy Life brand (allergy-friendly) |
| White Chocolate Chips 🍫 | ½ cup | Optional, for extra contrast |
| Flaky Sea Salt 🧂 | 1 tsp | Maldon preferred, for finishing |
The chocolates are non-negotiable. Enjoy Life brand for milk chocolate chips ensures no cross-contamination, and 70% cacao dark chocolate delivers that sophisticated bitter edge. I grab mine from Whole Foods or Trader Joe's—their bulk chocolate bars are perfect for chopping. White chocolate is optional but adds that extra visual pop. Pro tip: Toast the dark chocolate chunks for 2 minutes before mixing—they develop deeper flavor and crisp up beautifully during baking. For the butter, Plugrá or Land O'Lakes are my go-tos, but any unsalted will work if it's cold and cubed.
No vanilla extract? Vanilla bean paste works in a pinch, or scrape seeds from a pod into the dough. Running short on milk chocolate chips? Substitute with white chocolate chips—just reduce the total chocolate by half. The baking soda must be fresh—if it's over a year old, test it first with vinegar (should bubble vigorously). For the sugars, superfine blends more smoothly, but if you only have granulated, pulse it in a food processor for 30 seconds. The sea salt is key—Maldon flakes dissolve beautifully into the dough, but any flaky salt will do. And trust me, room-temperature eggs mix in more evenly than cold ones.
This dough is best used within 48 hours of mixing—it thickens as it rests. Wrap tightly in plastic and refrigerate between uses. For baking ahead, freeze dough balls on a tray first, then transfer to a bag for up to 3 months. Cookies stay crisp for 3 days in an airtight container, but honestly? They disappear faster than that. Store-bought chocolate chips keep for 6-12 months unopened, but once you open that bag, use them within 3 months for peak flavor. And if you're feeling fancy, sprinkle extra flaky salt on top right after baking—worth the extra minute.
Why You'll Love This Recipe
- Here’s what sold me: one batch of dough split into two—half with dark chocolate chunks, half with milk. The contrast is next level, but the best part? You only mix the dough once. Less work, double the magic.
- No Mixer Needed: I swear by this recipe when I’m in a hurry—just cream the butter and sugars by hand (or use a fork if you’re really lazy). The dough comes together faster than you can say “chocolate chip,” and honestly? It’s foolproof even if your kitchen looks like a tornado hit it.
- Two Flavors, Zero Effort: Here’s what sold me: one batch of dough split into two—half with dark chocolate chunks, half with milk. The contrast is next level, but the best part? You only mix the dough once. Less work, double the magic.
- Party in a Jar: Between us, these are my go-to for holidays, book club meetups, or just because. Package them in clear jars, tie a ribbon, and boom—you’ve got a gift that costs pennies but looks fancy. (My mom still thinks I’m a baking genius.)
Step-by-step instructions for black and white chocolate chip cookies
Watch these cookies transform from dough to golden perfection with contrasting crunch and melty streaks.
🍳 Step 1: Cream Butter and Sugars to Silky Smoothness
In a stand mixer fitted with the paddle attachment, combine the 1 cup unsalted butter (cold cubes) with 0.75 cup granulated sugar and 0.75 cup packed brown sugar. Beat on medium speed for 3-4 minutes until light and fluffy—you'll see the mixture nearly double in volume and turn pale. This step is non-negotiable for that signature tender crumb.
Here's the thing—I press the paddle against the bowl occasionally to scrape down any sugar clinging to the sides. The reason we wait until the butter is fully creamed is that cold butter creates pockets of air that develop into those beautiful crackly tops. If your butter feels too soft, chill the bowl for 10 minutes before proceeding.
👨🍳 Step 2: Incorporate Eggs and Vanilla for Rich Depth
Add the 2 whole large eggs one at a time, mixing on low speed for 30 seconds after each addition. Then stir in the 2 teaspoons pure vanilla extract until just combined. The mixture might look slightly curdled at first, but don't worry—it'll come together when we add the dry ingredients.
I always use room temperature eggs for even mixing, but if yours are cold, let them sit in warm water for 5 minutes first. This step builds the foundation for that rich, moist cookie texture. The vanilla extract should be high-quality—imitation won't give you that authentic depth of flavor we're after.
🥘 Step 3: Fold in Flour and Chocolate for Maximum Contrast
In a separate bowl, whisk together the 3 cups all-purpose flour, 1 teaspoon baking soda, and 0.5 teaspoon diamond crystal kosher salt. With the mixer on low speed, gradually add this dry mixture to the wet ingredients until just combined—you should still see a few flour streaks. This prevents overdevelopment of gluten, which would make our cookies tough.
Remove the bowl from the mixer and gently fold in the 1.5 cups dark chocolate chunks, 1.5 cups milk chocolate chips, and 0.5 cup white chocolate chips using a silicone spatula. I like to distribute them evenly throughout the dough so every bite delivers that perfect contrast of rich dark chocolate, sweet milk chocolate, and creamy white chocolate. Don't overmix—just enough to incorporate the chocolate.
⏰ Step 4: Chill the Dough for Perfect Texture
Cover the bowl with plastic wrap and refrigerate for at least 1 hour (I prefer 2 hours or even overnight). This chilling step is absolutely critical—it solidifies the butter, which prevents excessive spreading in the oven. It also allows the flour to fully hydrate, creating better texture and flavor development.
Cold dough also means the cookies hold their shape better when they hit the hot oven, resulting in thicker cookies with crispy edges and gooey centers. Pro tip: If you're short on time, place the dough in the freezer for 30 minutes—it works in a pinch, though not quite as well as refrigerating.
🔥 Step 5: Bake to Golden Perfection with Contrasting Streaks
Preheat your oven to 350°F and line two baking sheets with parchment paper. Using a 2-tablespoon scoop, portion the chilled dough onto the prepared sheets, spacing them 3 inches apart. The dough will be cold and firm, making it easier to handle without sticking.
Bake for 11-13 minutes until the edges are golden brown but the centers still look slightly underdone. They'll continue cooking on the hot pan after you remove them from the oven. Here's where the magic happens—the dark chocolate chunks should be slightly melted with crisp edges, while the white chocolate creates those beautiful creamy streaks throughout each cookie.
Let the cookies cool on the baking sheet for 5 minutes before transferring to a wire rack. While they're still warm, sprinkle each cookie with a pinch of flaky sea salt for that perfect salty-sweet contrast. Enjoy them warm for the ultimate experience—each bite delivers that perfect balance of textures and flavors we've worked so hard to achieve!
Pro Tips For Making Black And White Chocolate Chip Cookie
- Use Cold Butter for Dough: I learned this the hard way—soft butter makes cookies spread like pancakes. Cut that unsalted butter into cubes, toss them in the freezer for 10 minutes, then measure. The dough will hold its shape better, and you’ll get those thick, chewy centers you actually want.
- Mix Brown Sugar First: Skip the urge to dump everything in at once. Cream the brown sugar with the butter first—it dissolves faster and creates a smoother dough. After 2 minutes, add the granulated sugar. This prevents grainy pockets and makes the cookies taste richer right away.
- Underbake by 30 Seconds: The second the edges look set but the center’s still soft, pull them out. Ovens run hot, and black-and-white cookies dry out fast. Let them rest on the sheet for 5 minutes—they’ll firm up perfectly. Trust me, they’ll still be warm, gooey, and not sad and crumbly.
- Swap Vanilla for Extract: Store-bought vanilla flavorings taste artificial. Pure vanilla extract (the real deal) adds depth that changes the whole cookie. Use 1 teaspoon, and if you’re feeling fancy, add a pinch of salt to the dough—it balances the sweetness and makes the chocolate chips pop.
Regional styles of this recipe
Classic American Twist
This recipe's foundation comes from classic American chocolate chip cookies, but with a sophisticated upgrade. The original recipe from Toll House (1938) used only milk chocolate chips, but I've elevated it by adding 70% cacao dark chocolate chunks for depth and white chocolate chips for contrast.
The flaky sea salt finishing touch is inspired by modern bakeries like Levain Bakery in Seattle, where salty-sweet balance became a signature. 🌟
European Dark Chocolate Influence
The dark chocolate chunks give these cookies a European flair, similar to British Victoria sponge cakes that incorporate bitter chocolate. I source my dark chocolate from Valrhona or Lindt Excellence bars—they melt beautifully and add a sophisticated bitterness that complements the sweet milk chocolate.
For an extra layer of authenticity, toast the dark chocolate chunks for 2 minutes before mixing—they develop deeper caramelized flavors reminiscent of French pain au chocolat pastries.
Southern U.S. Butter Pecan Adaptation
In Southern states like Georgia and Alabama, butter-based cookies often incorporate pecans, but I've replaced them with white chocolate for a modern twist. The high butter content (1 cup) creates that signature tender crumb found in classic Southern pecan sandies, while the brown sugar adds the familiar caramelized sweetness.
For a true Southern touch, serve these cookies warm with a glass of sweet Southern Comfort or a cup of strong peach tea.
Nordic Spiced Variation
For a Scandinavian-inspired version, add ½ teaspoon ground cardamom and ½ teaspoon cinnamon to the dry ingredients. These warm spices pair beautifully with the chocolate and evoke flavors from Swedish kanelbullar (cinnamon buns). The dark chocolate adds a rich contrast that balances the spices perfectly.
I've tested this variation with Lindt Lindor truffles instead of chips—they melt into luxurious pools during baking, creating a luxurious cookie that feels like a dessert all its own.
Australian Anzac Cookie Fusion
Australian ANZAC biscuits use golden syrup and oats, but this fusion replaces those with chocolate for a decadent twist. Swap ½ cup of the flour for ½ cup rolled oats and add 2 tablespoons golden syrup to the wet ingredients.
The result is a cookie with chewy texture and caramelized edges, while the chocolate maintains its signature contrast. This version is especially popular during Australia's summer months when people crave something sweet but not too heavy.
Japanese Matcha-Inspired Twist
For a Japanese-inspired adaptation, replace 1 teaspoon of the flour with 1 teaspoon high-quality matcha powder (like Ippodo or Jade Leaf). The earthy matcha flavor complements the chocolate beautifully, creating a sophisticated cookie that's perfect for afternoon tea.
Add ½ teaspoon vanilla bean paste instead of extract for an extra layer of depth. These cookies pair wonderfully with sencha green tea or a cup of hōjicha for a complete Japanese-inspired experience. 💫
Nutrition facts
Frequently asked questions
Can I substitute white chocolate for milk chocolate?
You can, but it changes the flavor profile! White chocolate is sweeter and creamier, so use it as a partial replacement—try 1 cup white chocolate chips plus 1 cup milk chocolate chips instead of all milk. For a true contrast, keep the dark chocolate chunks separate—they provide that rich, bitter balance that makes these cookies special.
Why does my dough spread too much in the oven?
Overmixing or skipping the chill step are the most common culprits! Cold dough prevents spreading, so always refrigerate for at least 1 hour. Also, use a 2-tablespoon scoop and space cookies 3 inches apart on the baking sheet. If your butter was too soft, chill the dough balls for 30 minutes before baking.
How do I store these cookies to keep them fresh?
For maximum freshness, store in an airtight container at room temperature for up to 3 days. To extend shelf life, freeze dough balls for 3 months or baked cookies for 2 months (wrap individually in plastic). For extra crunch, revive slightly stale cookies by warming in a 300°F oven for 5 minutes. The chocolate stays melty best when stored properly!
What's the best way to reheat these cookies?
Warm cookies taste even better! Place them on a baking sheet and heat at 300°F for 3-5 minutes until fragrant. For a quick fix, microwave for 10-15 seconds (cover with a damp paper towel to prevent drying). The chocolate will soften beautifully, bringing back that fresh-baked magic.
Can I make these cookies vegan?
Replace butter with vegan butter or coconut oil, use flax eggs (1 tbsp ground flax + 3 tbsp water per egg), and opt for dairy-free chocolate chips. For binding, add 1 tbsp aquafaba (chickpea brine) to the dough. The texture will be slightly different but still delicious—just expect a denser cookie.