
Desserts
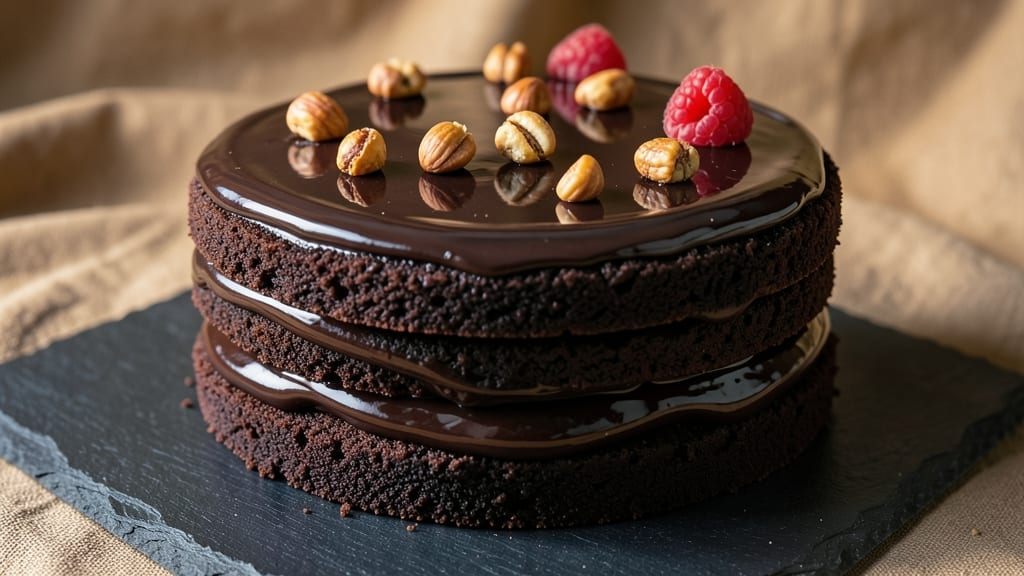
This black cocoa chocolate cake recipe delivers a sophisticated twist on classic chocolate cake, with deep espresso notes and an ultra-moist crumb that disappears in every bite.
The secret lies in using high-quality Dutch-process cocoa powder and a precise balance of leavening agents to create a rich, velvety texture without being dense. I developed this recipe after years of experimenting with cocoa varieties, and the difference between unsweetened and Dutch-process makes all the difference in flavor depth.
The cake's signature depth comes from a blend of espresso powder and black cocoa, which intensifies the chocolate flavor while adding subtle complexity.
With a prep time of just 20 minutes and a bake time of 30-35 minutes at 350°F, this recipe is perfect for special occasions or when you crave something decadent yet approachable. The layers stay moist for days, making it ideal for making ahead.
What sets this cake apart is its ultra-moist crumb—achieved through a combination of buttermilk and sour cream, which keep the texture tender while the cocoa powder adds richness. The frosting, a simple yet elegant ganache, complements the cake's depth without overpowering it.
Whether you're serving it at a dinner party or enjoying a slice with coffee, this cake delivers restaurant-quality results at home.
For an extra touch, dust the top with powdered cocoa or chocolate shavings before serving. The contrast of the dark cocoa against the cake's rich layers creates a visually stunning dessert that's as impressive as it is delicious. Let's get started on creating this showstopper cake.
Ingredients for black cocoa chocolate cake
High-quality cocoa and espresso powder meet buttermilk and sour cream for a decadent yet tender cake.
| Ingredient | Amount | Notes |
|---|---|---|
| All-Purpose Flour 🌾 | 2 cups | Sifted for light texture |
| Dutch-Process Cocoa Powder 🍫 | ¾ cup | High-quality for deep flavor |
| Granulated Sugar 🍚 | 2 cups | White or light brown |
| Light Brown Sugar 🍚 | ½ cup | Packed for moisture |
| Unsalted Butter 🧈 | 1 cup | Room temperature, cubed |
| Large Eggs 🥚 | 2 whole | Room temperature, separated |
| Buttermilk 🥛 | 1 cup | Cold for tender crumb |
| Sour Cream 🍦 | ½ cup | Full-fat for richness |
| Espresso Powder ☕ | 2 tbsp | Instant for deep flavor |
| Baking Powder 🧂 | 1 ½ tsp | Aluminum-free preferred |
| Baking Soda 🧂 | ½ tsp | Freshly measured |
| Salt 🧂 | ½ tsp | Fine sea salt |
| Vanilla Extract 🌿 | 2 tsp | Pure Madagascar preferred |
| Dark Chocolate Chips 🍫 | 1 cup | 70% cocoa or higher |
| Heavy Cream 🥛 | 1 cup | Cold for ganache |
The Dutch-process cocoa powder is non-negotiable here—it's what gives this cake that signature depth. Valrhona or Guittard are my go-tos, but any high-quality brand works. The espresso powder adds complexity without bitterness, so instant espresso powder is perfect. For the butter, Plugrá or Land O'Lakes are reliable, but any unsalted brand will do. Room temperature butter is crucial—it should be soft but not melted. The buttermilk and sour cream are what keep this cake ultra-moist, so don't skip the full-fat versions. If you're short on time, you can make buttermilk by mixing 1 tablespoon of vinegar or lemon juice into 1 cup of milk and letting it sit for 5 minutes.
No espresso powder? Instant coffee granules at half the amount work in a pinch, but the flavor won't be as deep. Running out of buttermilk? Substitute with plain yogurt thinned with a little milk. The dark chocolate chips can be swapped for chopped dark chocolate—just make sure it's at least 70% cocoa. For the ganache, if you don't have heavy cream, full-fat coconut milk works too, though the texture will be slightly different. The vanilla extract should be pure—imitation extracts won't give you that rich, authentic flavor. And if you're worried about the cake being too dense, trust the process: the combination of baking powder, baking soda, and the right amount of sugar keeps it light and airy.
This cake stays moist for 4-5 days when stored in an airtight container at room temperature. If you want to make it ahead, bake the layers, cool them completely, then wrap them tightly in plastic wrap. The ganache can be made up to 2 days in advance—just reheat the heavy cream gently before mixing with chocolate. For a showstopper presentation, dust the top with powdered cocoa or chocolate shavings right before serving. The contrast of the dark cocoa against the rich layers is what makes this cake look as good as it tastes.
Why You'll Love This Recipe
- You’re probably already stocked: flour, sugar, butter, cocoa. No weird imports or hard-to-find ingredients. And the leftovers? They last forever if you store them right—trust me, I’ve tested this.
- No Mixer Needed: I swear by this recipe when I’m too tired to cream butter and sugar—just melt the butter, whisk everything together, and pour. The Dutch-process cocoa gives that deep, rich flavor without the fuss of extra steps.
- Rich Without Bitterness: That light brown sugar keeps it from being too heavy, and the butter makes every crumb dangerously moist. Honestly? It’s the kind of cake where I’ll take seconds just to taste the difference.
- Party or Pudding: Slice it for a birthday cake, crumble it over ice cream, or pack it in a lunchbox—this cake handles everything. Between us, I’ve even used it as a base for brownies when I’m lazy.
Step-by-step instructions for black cocoa chocolate cake
Here's how to bake a rich, ultra-moist cake with deep espresso notes that'll impress everyone.
Cream Butter and Sugars for Maximum Moisture
In a stand mixer fitted with the paddle attachment, beat the room-temperature unsalted butter on medium speed for 2-3 minutes until completely smooth and pale. This ensures proper emulsification with the sugars. Gradually add the 2 cups granulated sugar and 0.5 cup packed light brown sugar, mixing on medium-high speed for another 3-4 minutes until the mixture is light, fluffy, and nearly doubles in volume.
The reason for this thorough creaming is to incorporate as much air as possible—this creates that signature tender crumb. You'll notice the mixture becoming pale and ribbony when it's ready. If you're using a hand mixer, this step will take about twice as long, so be patient.
Incorporate Wet Ingredients for Perfect Texture
Add the 2 whole large eggs, one at a time, mixing well after each addition until fully incorporated. Then stir in the 2 tsp vanilla extract. In a separate bowl, whisk together the 1 cup cold buttermilk, 0.5 cup sour cream, and 2 tbsp espresso powder. Slowly pour this mixture into the butter-sugar mixture while mixing on low speed.
This is where the magic happens—the buttermilk and sour cream add moisture and richness while the espresso powder infuses that deep, complex flavor. The mixture should be smooth but still slightly thick. If it looks too thin, don't worry—the dry ingredients will thicken it up in the next step.
Combine Dry Ingredients Gently
In a separate bowl, sift together the 2 cups all-purpose flour, 0.75 cup Dutch-process cocoa powder, 1.5 tsp baking powder, 0.5 tsp baking soda, and 0.5 tsp salt. With the mixer on low speed, gradually add the dry ingredients to the wet mixture, mixing just until combined. Be careful not to overmix—you should still see some flour streaks.
This careful combination ensures you develop gluten just enough for structure without making the cake tough. The cocoa powder and baking soda work together to create lift while maintaining that rich chocolate flavor. Fold in the 1 cup dark chocolate chips by hand using a spatula to distribute them evenly throughout the batter.
Bake for Perfect Doneness
Preheat your oven to 350°F and grease two 9-inch round cake pans (or line with parchment paper). Divide the batter evenly between the pans. Bake for 30-35 minutes or until a toothpick inserted in the center comes out clean. The edges should be set but the center should still have a slight bounce.
Don't overbake—this cake benefits from being slightly underdone in the center. The residual heat will finish cooking it as it cools. If the tops brown too quickly, tent loosely with foil after 20 minutes. Let the cakes cool in the pans for 10 minutes, then transfer to a wire rack to cool completely before assembling.
Create the Chocolate Ganache Layer
While the cakes cool, prepare the ganache by heating the 1 cup heavy cream in a small saucepan over medium heat until it just begins to simmer. Pour the hot cream over the 1 cup dark chocolate chips in a heatproof bowl and let sit for 5 minutes. Then stir until smooth and glossy.
This ganache will be the secret to that ultra-moist texture when layered between the cakes. Let it cool slightly until it's thick enough to spread but still pourable. The contrast between the rich ganache and the tender cake layers creates that perfect balance of textures and flavors.
Pro Tips For Making Black Cocoa Chocolate Cake
- Sift the Cocoa Twice: Dutch-process cocoa loves to clump like a stubborn teenager. Give it two quick passes through a fine-mesh sieve—once when measuring, again after mixing with dry ingredients—so your batter stays smooth and the cake rises evenly. I learned this the hard way when my first batch turned out dense as a brick.
- Melt Butter Slowly: Heat your butter over medium-low until it’s just melted, then let it cool for 5 minutes before adding to the sugar. Hot butter shocks the sugar, making it crystallize faster and giving you a grainy mess. Patience here means a lighter, more tender crumb—no one wants cake that tastes like sugar cubes.
- Don’t Overmix the Batter: Once you fold in the eggs and melted butter, stop mixing after 30 seconds. Overworking the batter introduces too much air, which collapses during baking, leaving you with a sad, flat cake. Use a spatula to gently fold—just until combined—and let the leavening do its job.
- Bake Until Springy: Your cake’s done when the edges pull away from the pan and a toothpick comes out with moist crumbs, not wet batter. The center should spring back slowly when pressed—like a trampoline with a slight bounce. Overbaking turns rich chocolate cake into dry cardboard, and no one deserves that.
Essential equipment for this dish
Stand Mixer Essentials
Your stand mixer is the workhorse for this recipe—I use my KitchenAid Artisan Series with the paddle attachment for creaming butter and sugar. The paddle creates more air than a whisk, which is key for that ultra-moist crumb.
If you don’t have a stand mixer, a hand mixer works, but be prepared to mix for 5-10 minutes longer to achieve the same light texture. 🌟
Precision Measuring Tools
Accurate measurements are non-negotiable here, especially with the Dutch-process cocoa powder and baking powder. I recommend OXO Good Grips measuring cups for dry ingredients and a digital kitchen scale for the butter and chocolate.
The difference between 1/4 tsp too much baking powder and the perfect amount can mean the difference between a cake that rises properly and one that collapses. For wet ingredients, a liquid measuring cup with a spout makes pouring buttermilk and sour cream effortless.
Quality Cocoa Powder
Invest in high-quality Dutch-process cocoa powder—brands like Valrhona or Guittard make all the difference. The Dutch-process method neutralizes some of the acidity in cocoa, resulting in a smoother, richer flavor. Avoid natural cocoa powder unless you want a more acidic, tangy taste.
Store your cocoa powder in an airtight container away from heat and moisture to preserve its freshness. A small spice jar with a tight seal works perfectly for this.
Baking Pans and Parchment
Use two 9-inch round cake pans with removable bottoms for even baking and easier release. I line the bottoms with parchment paper circles to prevent sticking and ensure clean slices.
If you don’t have removable pans, grease them thoroughly with butter and flour or use a baking spray like Baker’s Joy for a non-stick finish. Avoid non-stick pans—they can cause uneven baking and affect the texture of the cake.
Thermometer for Perfect Ganache
A candy or instant-read thermometer is essential for making the ganache. Heat the heavy cream until it reaches 200°F—this ensures it’s hot enough to melt the chocolate completely but not so hot that it seizes.
I use a Thermoworks ThermaPen because it’s fast and accurate. Once the cream is poured over the chocolate, let it sit for 5 minutes before stirring to create a silky, glossy finish. 💫
Wire Racks and Cooling Tools
Let the cakes cool completely before assembling to prevent a soggy bottom layer. I use two large wire racks placed over a baking sheet to catch any crumbs.
For even faster cooling, place the pans on the racks and set them over a bowl of ice water for 10-15 minutes—this trick speeds up the process without affecting the texture. Once cooled, transfer the cakes to a cooling rack to finish cooling completely before frosting.
Nutrition facts
Frequently asked questions
Why does this recipe use Dutch-process cocoa powder instead of regular cocoa?
The Dutch-process method removes natural acids from cocoa beans, creating a smoother, richer flavor with deeper chocolate notes. This is what gives your cake that signature espresso-like complexity. Regular cocoa would make the cake taste more bitter and tangy.
Can I make this cake without buttermilk or sour cream?
Yes, but your cake may be less moist. Substitute buttermilk with 1 cup milk + 1 tbsp vinegar/lemon juice (let sit 5 mins). For sour cream, use 1 cup plain yogurt. The fat content is crucial for that ultra-tender crumb. If using substitutes, reduce other liquids by 2 tbsp to maintain balance.
How do I prevent my cake from cracking on top?
Cracking usually happens from uneven baking or opening the oven too soon. Bake at 350°F with the oven rack in the middle position. If the top browns too quickly, tent loosely with foil after 20 minutes. Also ensure your pans are properly greased or lined with parchment. Let the cake cool completely before frosting to prevent stress on the layers.
What's the best way to store leftovers?
Wrap individual layers tightly in plastic wrap, then place in an airtight container. This cake stays moist for 4-5 days at room temperature. For longer storage, freeze layers (without frosting) for up to 3 months. Thaw at room temperature before reassembling. The ganache can be reheated gently if it thickens during storage.
Can I use this recipe for cupcakes instead of a layer cake?
Reduce the batter to fill 12-15 cupcake liners (about 2/3 of the original amount). Bake at 350°F for 18-22 minutes** or until a toothpick comes out clean. The espresso-cocoa flavor works perfectly in cupcakes too—consider adding chocolate espresso beans for extra flair!