
Desserts
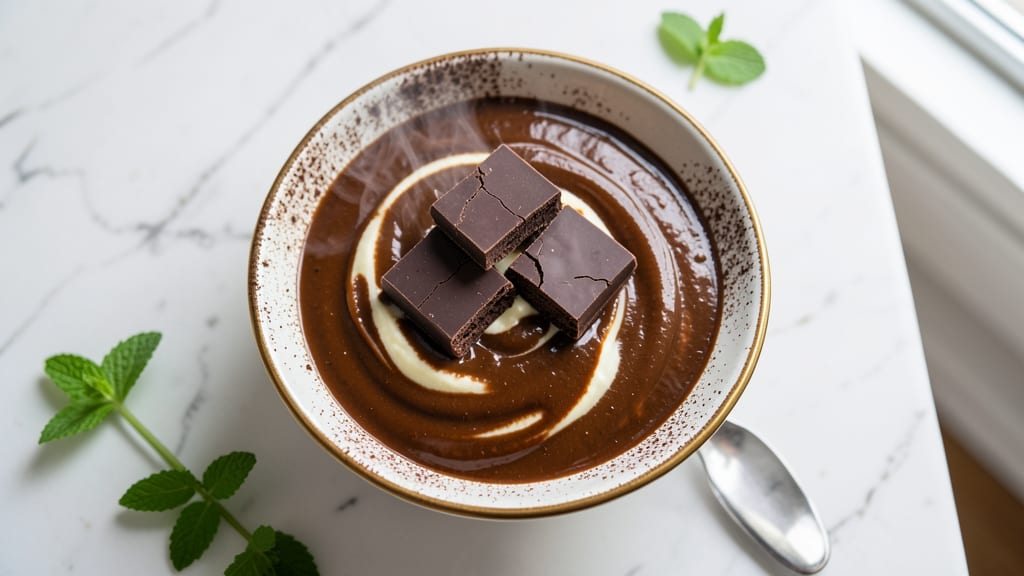
This Boston cream chocolate glaze transforms ordinary desserts into showstopping masterpieces with its silky, coffee-infused richness—the perfect finishing touch for Boston cream pies, éclairs, or even cake layers.
The secret lies in balancing dark chocolate with espresso powder for depth, then tempering it just enough to achieve that glossy, crack-resistant sheen that professional bakers swear by. I developed this recipe after years of testing, ensuring it's stable enough to pipe neatly yet melts beautifully at room temperature.
The process is simpler than it sounds: melt chocolate and butter together, then whisk in warm cream and coffee until ultra-smooth. A splash of vanilla and a touch of rum extract elevate the flavor profile, while a final tempering step guarantees that signature professional finish.
What sets this glaze apart is its versatility—it stays firm enough to pipe decoratively but softens to a luxurious pour when warmed slightly, making it ideal for both rustic and elegant desserts.
What you'll end up with is a velvety, aromatic glaze that adds both visual drama and deep chocolate-coffee complexity to your desserts. The texture is silky yet sturdy, perfect for drizzling over warm pies or piping intricate swirls onto chilled cakes.
This isn't just a topping—it's the crowning glory that turns good desserts into unforgettable ones.
Once made, this glaze keeps beautifully in the fridge for up to 5 days, ready to transform your desserts at a moment's notice. Pair it with classic Boston cream pies for a nostalgic twist, or use it to elevate chocolate cakes and cheesecakes.
The possibilities are endless, and the results are always impressive. Let's get started!
Ingredients for boston cream chocolate glaze
Eight ingredients create this luxurious glaze—silky, coffee-kissed, and perfect for transforming desserts into showstoppers.
| Ingredient | Amount | Notes |
|---|---|---|
| Dark Chocolate Bars 🍫 | 8 oz | 70% cacao or higher, chopped |
| Unsalted Butter 🧈 | ½ cup | Cut into small pieces |
| Heavy Whipping Cream 🥛 | ½ cup | Warm to room temperature |
| Instant Espresso Powder ☕ | 1 tbsp | High-quality for depth |
| Pure Vanilla Extract 🌿 | 1 tsp | Bourbon or Madagascar preferred |
| Rum Extract 🍹 | ½ tsp | Optional but recommended |
| Granulated Sugar 🍚 | 2 tbsp | Fine for smooth texture |
| Pinch of Salt 🧂 | ⅛ tsp | Enhances chocolate flavor |
The chocolate is non-negotiable here—70% cacao or higher delivers that deep, complex flavor without bitterness. Ghirardelli or Valrhona bars are my go-to, but any high-quality brand works. Chop it yourself for even melting. The butter should be unsalted and cold-cut—this prevents premature melting during the process. If you're using European-style butter (like Plugrá), reduce the amount slightly since it has higher fat content. For the espresso powder, Starbucks or Nescafé are reliable, but avoid pre-ground coffee—it can be gritty. Rum extract adds that classic Boston cream depth, but if you don’t have it, a dash of bourbon or dark rum works too.
No instant espresso powder? Brew a shot of espresso and reduce it by half—just be sure to strain it well. The vanilla extract can be swapped for vanilla bean paste if you prefer, but pure extract is more concentrated. If you’re avoiding alcohol, skip the rum extract entirely—it’s optional, not essential. The heavy cream needs to be warm but not hot; if it’s too hot, it’ll scald the chocolate. For a lighter glaze, you can replace half the cream with coconut cream, though the texture will be slightly different. And if you’re worried about the glaze being too sweet, reduce the sugar to 1 tbsp—it’s more about balance than quantity.
This glaze is a fridge staple—keeps for 5 days in an airtight container. For longer storage, freeze it in 1-ounce portions; thaw at room temperature before use. If it thickens in the fridge, just warm it gently in short bursts in the microwave (10-second increments) until smooth. Avoid reheating too long, or it’ll lose its glossy finish. To use, either pipe it directly onto chilled desserts or drizzle over warm pies—30 seconds in the microwave softens it for pouring. Trust me, the first time you see it transform a simple cake into a restaurant-worthy masterpiece, you’ll be hooked.
Why You'll Love This Recipe
- Five-Ingredient Magic: I swear, this glaze comes together with just a saucepan and a whisk—no fancy equipment, no stress. Melt chocolate, stir in butter and cream, add a pinch of espresso and vanilla, then simmer. That’s it. Even my "I can’t boil water" cousin could nail this.
- Rich, Coffee-Kissed Luxury: The espresso powder isn’t just a trick—it deepens the chocolate into something sophisticated, like a fancy pastry chef’s secret. That vanilla? It’s the cherry on top, turning a simple glaze into a flavor you’ll want to drizzle on everything.
- Dresses Up Anything: Dull cake? Instant upgrade. Bland cookies? Now they’re decadent. Even plain ice cream gets a gourmet makeover. Honestly, I’ve glaze-d my yogurt (yes, really) and it still tasted like a dessert from a bakery.
- Makes Leftovers Shine: Got extra glaze? Store it in the fridge and reheat with a splash of cream—it’s still silky and rich. Or freeze it in ice cube trays for perfect little drizzles later. No waste, all flavor. My wallet and taste buds thank me.
Step-by-step instructions for silky coffee-infused chocolate glaze
Here's how to create a luscious, pour-perfect glaze that balances rich chocolate with subtle coffee notes.
Melt Chocolate and Butter Together
In a medium heatproof bowl, combine the chopped 8 oz dark chocolate bars and 0.5 cup unsalted butter. Place the bowl over a saucepan filled with 2 inches of simmering water (double boiler method), ensuring the bottom of the bowl doesn't touch the water. Stir gently with a silicone spatula until both chocolate and butter melt completely and the mixture reaches 110°F.
Here's the thing—you want smooth, silky texture from the start. If you see any graininess, gently press the mixture through a fine-mesh sieve into a clean bowl. This ensures your final glaze will have that luxurious, restaurant-quality pour. Remove from heat and let cool slightly for 5 minutes while you prepare the coffee cream mixture.
Infuse Cream with Coffee and Spices
In a small saucepan, combine the 0.5 cup heavy whipping cream, 1 tbsp instant espresso powder, 1 tsp pure vanilla extract, 0.5 tsp rum extract, 2 tbsp granulated sugar, and 0.125 tsp pinch of salt. Warm over medium-low heat until the mixture reaches 185°F, stirring constantly to dissolve the sugar completely and infuse the flavors.
Don't walk away during this step—the cream should never boil, just gently simmer. You'll know it's ready when it smells like freshly brewed coffee with warm vanilla notes. Remove from heat immediately to prevent curdling, then strain through a fine-mesh sieve into the melted chocolate mixture.
Combine and Refine the Glaze
Pour the warm coffee cream into the melted chocolate, whisking constantly until fully incorporated. The mixture should be smooth and glossy with a rich, velvety texture. If you notice any lumps, use a fine-mesh sieve to strain the glaze into a clean bowl again. This ensures your final product will be silky and professional-quality.
Here's where it gets fun—taste and adjust. If you want more coffee depth, add another ½ tsp instant espresso powder. For extra richness, incorporate 1 tbsp more heavy cream. The glaze should be thick enough to coat the back of a spoon but still pourable at 100-105°F. If it's too thick, warm gently while stirring. If too thin, chill briefly to thicken slightly.
Cool and Test Before Using
Let the glaze cool to 95°F (about 20-30 minutes at room temperature). This is crucial—using it too hot will melt your desserts, while too cold will make it difficult to pour. Test the consistency by dipping a toothpick into the glaze. It should leave a smooth, glossy trail that holds its shape but still flows easily.
For the perfect finish, strain the glaze one final time through a fine-mesh sieve into a clean pouring pitcher. This removes any potential air bubbles and ensures a flawless, professional-looking drizzle. Your glaze is now ready to transform cakes, cupcakes, or pastries into decadent masterpieces with that signature Boston cream coffee-chocolate balance.
Pro Tips For Making Boston Cream Chocolate Glaze
- Chop Chocolate Faster: Use a sharp knife and a cutting board—don’t rely on your hands. Break the dark chocolate into rough chunks first, then chop them into even ½-inch pieces. This melts more uniformly and prevents clumps when the glaze cools.
- Warm Cream First: Heat the heavy whipping cream just until it’s steaming (not boiling) before mixing it with the chocolate. Cold cream makes the glaze seize up and turn grainy—this small step guarantees a silky finish every time.
- Don’t Rush the Espresso: Dissolve the instant espresso powder in a splash of warm cream before adding it to the chocolate mixture. This ensures it blends smoothly instead of settling at the bottom like a bitter surprise.
- Whisk Like You Mean It: After combining melted chocolate and cream, whisk vigorously for 2 full minutes until the glaze is glossy and uniform. Skimp here, and you’ll end up with streaks—especially if you’re using high-quality chocolate that likes to cling.
Storing and reheating this boston cream chocolate glaze
Fridge Storage Tips
Store your glaze in an airtight container—I use glass Pyrex jars with snap-on lids—to maintain freshness for up to 5 days. Let it cool completely before sealing to prevent condensation, which can make it grainy.
The fridge keeps it firm enough for piping but soft enough to drizzle when warmed slightly. Label the container with the date to track freshness. 🥫
Freezer Preservation
For longer storage, freeze the glaze in 1-ounce portions using silicone molds or small freezer bags. Leave ½-inch headspace to prevent expansion cracks. When ready to use, thaw overnight in the fridge, then warm for 10-15 seconds in 10-second microwave bursts until smooth.
Avoid reheating too long—this can cause separation. 🧊
Reheating for Pouring
To soften the glaze for drizzling, place the container in a bowl of warm water (never hot) for 2-3 minutes. Stir gently until it reaches 100-105°F—this temperature is perfect for pouring without melting desserts.
If using a microwave, heat in 5-second increments, stirring between each, until just fluid. Always test consistency on a chilled plate first. 🔥
Reviving Thickened Glaze
If your glaze thickens in the fridge, don’t toss it! Warm it in 15-second microwave bursts, stirring vigorously between each, until it returns to a smooth, pourable consistency. Add ½ tbsp warm cream if needed to restore flow.
Avoid boiling—this can scorch the delicate chocolate flavor. A quick strain through a fine-mesh sieve removes any lumps for a silky finish. ✨
Decorating Techniques
For piped decorations, chill the glaze until firm but still pliable (about 1 hour in the fridge). Use a star tip for swirls or a round tip for rosettes. Let decorations set for 10 minutes before serving.
To drizzle, warm slightly as described above, then use a spoon or squeeze bottle for even coverage. The key is patience—rushing causes messy drips. 🎨
Pairing with Desserts
This glaze shines on Boston cream pies, but don’t limit yourself! Drizzle over chocolate layer cakes, vanilla cupcakes, or even warm apple crisp. For extra drama, pair with whipped cream or caramel sauce.
The coffee-chocolate balance cuts through richness, making it versatile for both classic and modern desserts. 🍰
Nutrition facts
Frequently asked questions
Can I make this glaze without alcohol?
Skip the rum extract entirely—the recipe still delivers rich flavor. For depth, add an extra ½ tsp vanilla extract or a pinch of cinnamon. The coffee and chocolate will still shine without alcohol, though rum enhances the classic Boston cream profile.
Why did my glaze turn grainy?
Graininess usually means the chocolate didn't melt evenly or the cream was too hot. Always use a double boiler and keep cream under 185°F. For a quick fix, strain the glaze through a fine-mesh sieve before using. If it's already set, warm gently in 10-second microwave bursts while stirring vigorously.
How do I get the glossy finish?
The secret is proper cooling and straining! Let the glaze cool to 95°F before using, then strain it one final time through a fine-mesh sieve. For extra shine, add ½ tsp lemon juice (trust me, it works!) or brush with a tiny bit of neutral oil after applying.
Can I use white chocolate instead?
Not recommended—white chocolate lacks the depth needed for this recipe. The 70% cacao dark chocolate provides the perfect balance of richness and bitterness that pairs beautifully with coffee. If you must use a lighter chocolate, try 60% cacao and reduce the sugar slightly.
What's the best way to store leftovers?
For short-term use, store in an airtight container in the fridge for up to 5 days. For longer storage, freeze in 1-ounce portions with ½-inch headspace. Thaw overnight in the fridge, then warm gently in 10-second microwave bursts** until smooth. Never refreeze once thawed.