
Desserts
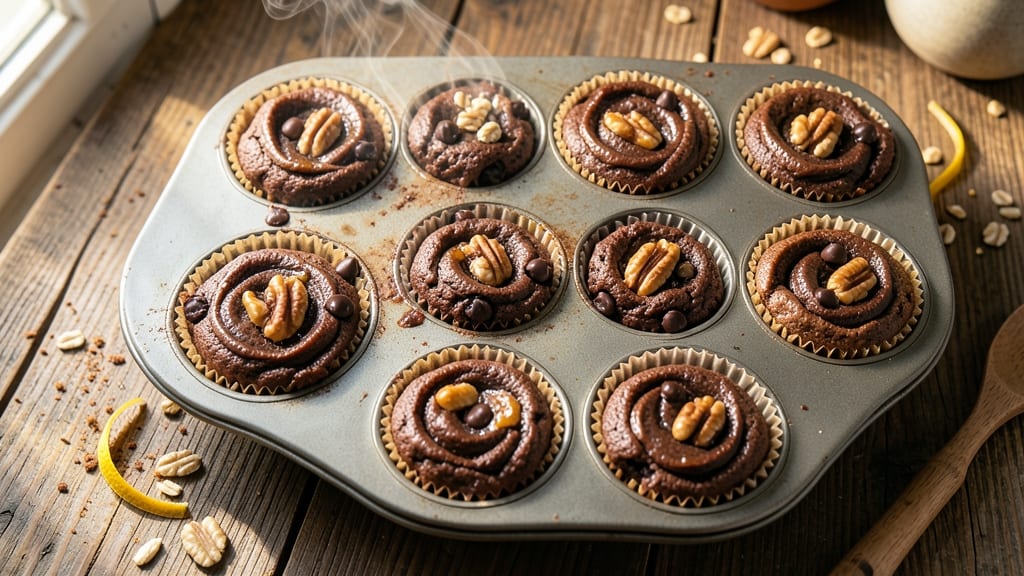
This brownie chocolate chip cookie recipe in muffin tin delivers the best of both worlds—rich, fudgy brownie layers topped with gooey chocolate chip cookie crumbles—all baked in individual portions for perfect handheld treats. I developed this hybrid dessert after realizing how much I missed both textures together, and the muffin tin method makes it foolproof for gatherings or satisfying single servings.
The secret to these mini bites lies in the layered approach: a dense brownie base with a cookie crumble topping that bakes into crispy edges and soft centers. Using melted butter in both layers ensures maximum moisture, while folding in chocolate chips at the end keeps them melty and irresistible.
Bake at 350°F for 12-15 minutes—just enough time for the edges to set while the centers stay fudgy.
What you end up with is a dessert that’s restaurant-quality but homemade, perfect for parties or a solo indulgence. The muffin tin format makes them easy to serve—no cutting required—and they pair beautifully with vanilla ice cream or whipped cream for dipping.
These are the kind of treats that disappear faster than you can say "second helping."
Confession: I’ve been known to make a double batch just to test the texture variations. The brownie layer stays rich and decadent, while the cookie crumble adds a satisfying contrast that keeps every bite exciting. Let’s make these!
Ingredients for brownie chocolate chip cookie recipe in muffin tin
Twelve ingredients for triple-layered magic—rich brownie base, cookie crumble topping, melty chocolate chips.
| Ingredient | Amount | Notes |
|---|---|---|
| Unsalted Butter 🧈 | 1 ½ cups | Melted, cooled slightly |
| Granulated Sugar 🍚 | 1 ½ cups | Light brown preferred |
| Packed Dark Brown Sugar 🍚 | 1 cup | For cookie crumble |
| Large Eggs 🥚 | 2 whole | Room temperature |
| Vanilla Extract 🌿 | 2 tsp | Pure, high-quality |
| All-Purpose Flour 🌾 | 1 ½ cups | Sifted, no substitutions |
| Unsweetened Cocoa Powder 🍫 | ½ cup | Natural, not Dutch-process |
| Baking Powder 🍞 | ½ tsp | Aluminum-free |
| Salt 🧂 | ½ tsp | Diamond Crystal preferred |
| Semisweet Chocolate Chips 🍫 | 1 ½ cups | Enjoy Life brand for allergies |
| Old-Fashioned Rolled Oats 🌾 | ½ cup | Blended into crumble |
| Chopped Walnuts 🌰 | ¼ cup | Toasted for flavor |
| Muffin Tin Liners 📦 | 12 pieces | Non-stick or parchment |
The butter and sugars are the foundation here. Use European-style butter if you can find it—higher fat content means richer flavor. For the chocolate chips, Enjoy Life brand is my go-to (they're dairy-free friendly too), but any quality brand works. The cocoa powder makes or breaks the brownie layer—natural, not Dutch-process gives that authentic chocolate taste. I always grab mine from Whole Foods or Trader Joe's where they keep it fresh. The rolled oats for the crumble? Old-fashioned, not quick oats—they hold their shape better when baked. Toast them lightly in a dry pan first for extra flavor.
No brown sugar? White sugar plus a teaspoon of molasses works in a pinch. Running short on chocolate chips? Chop a bar of chocolate into chunks—just make sure they're at least 60% cacao for that rich taste. The walnuts can be swapped for pecans if you're feeling fancy, but I like the earthy contrast they add. For the cookie crumble, if you don't have baking powder, use 1/4 teaspoon baking soda plus 1/4 teaspoon cream of tartar. And trust me on the vanilla extract—the pure, high-quality stuff makes all the difference in that first bite.
Store the baked treats in an airtight container at room temperature for up to 3 days, though they'll disappear faster than that. For longer storage, freeze them for up to 3 months—just thaw at room temperature for 10 minutes before serving. I like to make a double batch and freeze half immediately. These reheat beautifully in the microwave for 10-15 seconds if you want them warm. The muffin tin liners make serving effortless—just pop them out and serve straight from the tin!
Why You'll Love This Recipe
- Muffin Tin Magic: I swear by this method—no pans to wash, no waiting for a sheet tray to cool. Just pop those cups in, bake, and boom, you’ve got perfectly portioned treats in under 25 minutes.
- Rich Caramel Crunch: That combo of brown sugar and butter? It’s like a warm hug for your taste buds. The chocolate chips melt just enough to ooze into every bite, while the edges stay almost too crisp to resist.
- Snack Attack Ready: Between us, these are my go-to for lunchboxes, last-minute gifts, or when I need a dessert fix but don’t want to deal with a whole pan. Honestly, they’re the reason I keep a muffin tin in my pantry.
- Zero-Waste Win: Make a batch, freeze half—no one will know they’re not fresh. And since you’re using pantry staples (hello, butter and sugar), your wallet stays happy too. Plus, they reheat like a dream in the microwave.
Step-by-step instructions for triple-layered brownie chocolate chip cookies
Here's how to create these decadent muffin-tin treats with perfect texture in every bite.
Prepare the Cookie Crumble Base
Preheat your oven to 350°F and line a muffin tin with the 12 pieces muffin tin liners. In a medium bowl, combine the 0.5 cup old-fashioned rolled oats, 0.25 cup chopped walnuts, and 0.5 cup unsweetened cocoa powder. Add the 1 cup packed dark brown sugar and mix until evenly distributed.
In a separate small bowl, melt the 1.5 cups unsalted butter (just until it's liquid but not hot) and pour it over the dry ingredients. Stir until everything is thoroughly coated and you have a crumbly mixture. This will form the crunchy, flavorful base layer that sets these treats apart.
Create the Brownie Layer
In a large mixing bowl, whisk together the 1.5 cups granulated sugar, 1.5 cups all-purpose flour, 0.5 tsp baking powder, and 0.5 tsp salt. In another bowl, beat the 2 whole large eggs until just combined, then add the 2 tsp vanilla extract and mix well.
Gradually fold the dry ingredients into the egg mixture until just combined - you want to maintain some texture rather than overmixing. Gently fold in 1 cup semisweet chocolate chips, reserving the remaining 0.5 cup for later. This brownie layer will be the rich, fudgy center that makes these so irresistible.
Assemble the Triple Layers
Scoop about 1 tablespoon of the crumble mixture into each muffin liner, pressing it down gently to create a firm base. This first layer will provide the perfect crunchy foundation for the brownie to sit on.
Next, carefully spoon 1 tablespoon of the brownie batter over each crumble base, pressing down lightly to ensure good contact. Then add another 1 tablespoon of crumble mixture on top of the brownie layer. Finally, add the remaining 0.5 cup semisweet chocolate chips distributed evenly among all 12 muffins.
Bake to Golden Perfection
Place the assembled muffin tin in the preheated oven and bake for 18-22 minutes until the edges are golden brown and a toothpick inserted comes out with just a few moist crumbs. The tops should look slightly cracked but not overly browned.
Let the cookies cool in the pan for 5 minutes before transferring them to a wire rack to cool completely. The contrast between the warm, gooey brownie center and the crunchy cookie layers is what makes these truly special. Serve warm for the ultimate indulgence!
Pro Tips For Making Brownie Chocolate Chip Cookie Recipe In Muffin Tin
- Melt Butter Slowly: I learned this the hard way—microwaving butter for these cookies makes it split and grainy. Instead, melt it in a saucepan over medium-low heat, stirring every 10 seconds, until it’s just liquid. The gentle heat keeps it smooth, and your batter won’t look like it’s fighting for its life.
- Mix Wet Ingredients First: Dumping all the dry ingredients into the wet batter at once? That’s how you end up with lumps. Whisk the eggs, sugars, and vanilla together until the mixture is fully combined and slightly thickened before adding anything else. This ensures the butter gets properly emulsified, and your cookies won’t turn out cakey or dense.
- Watch the Muffin Tin: These are not your average cookies—they spread more than you’d expect. Fill the muffin cups only ¾ full, and resist the urge to overpack the batter. If you’re using a standard 12-cup tin, aim for about 2 tablespoons per cup. Trust me, your edges will thank you.
- Chill the Batter 15 Minutes: I was skeptical until I tried it: letting the batter sit in the fridge for 15 minutes before baking makes a real difference. The flour absorbs the liquid better, and the cookies hold their shape instead of puffing up like sad little volcanoes. Plus, it gives you time to preheat the oven properly—because nothing ruins a batch like a cold tin.
Pro cooking tips for great brownie chocolate chip cookie recipe in muffin tin
Layering Like a Pro
Don't just dump everything in the muffin tin—layering is key for that perfect texture contrast. Start with a 1-tablespoon crumble base in each liner, pressing it down firmly with the back of a spoon.
This creates a sturdy foundation that prevents the brownie from sinking. I like to use a small rubber spatula for this step because it gives me better control than a spoon. 💡
When adding the brownie batter, use a cookie scoop (about 1-tablespoon size) to portion it evenly. Press down gently with your finger to create a slight well in the center—this helps the final crumble layer stick better.
The brownie should fill about ¾ of the liner height before adding the top crumble layer.
Butter Temperature Matters
Your melted butter needs to be just right—liquid but not hot. If it's too hot, it will cook the eggs too quickly and make your cookies spread excessively. I test it by touching a drop to my wrist—it should feel warm but not burning.
For the crumble layer, let the butter cool slightly before mixing with the dry ingredients to prevent the oats from turning mushy. 🌡️
Pro tip: If your kitchen gets warm, chill the butter mixture for 10 minutes before adding to the dry ingredients. This extra step makes a noticeable difference in texture—your crumble will stay crisp rather than turning into a paste.
Baking Time Precision
These treats bake faster than you think—18-22 minutes is the sweet spot for perfect doneness. The edges should be golden brown, but the centers should still look slightly underbaked.
If you're unsure, do the toothpick test: insert it into the center of a muffin. It should come out with moist crumbs (not wet batter) and a few cookie crumbles. 🕒
Watch the oven closely after 15 minutes—every oven runs slightly differently. If the tops are browning too quickly, tent the tin with aluminum foil. The goal is slightly cracked tops with a gooey center that's still warm when you serve them.
Underbaking by a minute or two ensures that perfect texture.
Chocolate Chip Placement
Don't just toss the chocolate chips in randomly—they need strategic placement for maximum impact. Reserve ½ cup until the very end and scatter them evenly across all muffins. I like to use a small sieve for this because it distributes them more evenly than sprinkling by hand. 🍫
The chips should be visible on top but not buried under the crumble layer. This ensures they stay melty in the center while providing that satisfying crunch with every bite.
If you're feeling fancy, press a few extra chips into the sides of each muffin before baking—they'll melt slightly and create a beautiful golden crust.
Nutrition facts
Frequently asked questions
Can I make these without a muffin tin?
Use a standard baking sheet lined with parchment paper and form each layer into 1.5-inch diameter balls (about 1 tablespoon each). Bake at 350°F for 10-12 minutes instead, checking for golden edges. The texture will be slightly different but still delicious—just expect more manual work for shaping!
Why does my crumble layer turn into a paste?
This happens when the melted butter is too hot or the oats absorb too much moisture. Always use cooled melted butter (test by touching a drop to your wrist—it should feel warm, not hot) and blend the crumble mixture just until combined. If it's still sticky, add 1 extra tablespoon of cocoa powder to absorb moisture.
How do I store these for maximum freshness?
Keep them in an airtight container at room temperature for up to 3 days, though they'll disappear faster! For longer storage, freeze them for up to 3 months. Thaw at room temperature for 10 minutes before serving—no need to reheat unless you prefer them warm. The crumble stays crispy when properly stored!
Can I make this recipe gluten-free?
Yes! Replace the 1.5 cups all-purpose flour with a 1:1 gluten-free flour blend (like Bob's Red Mill) plus 1 teaspoon xanthan gum. For the crumble, use gluten-free oats and check your chocolate chips are certified gluten-free. The texture will be slightly denser but still delicious—just expect a 1-2 minute longer bake time.
What's the best way to serve these?
Warm is best! Serve straight from the oven with a scoop of vanilla ice cream or a dollop of whipped cream for dipping. For a fancy touch, sprinkle with flaky sea salt or drizzle with melted chocolate. They're perfect for parties—just pop them out of the liners and arrange on a platter for easy grabbing!