
Desserts
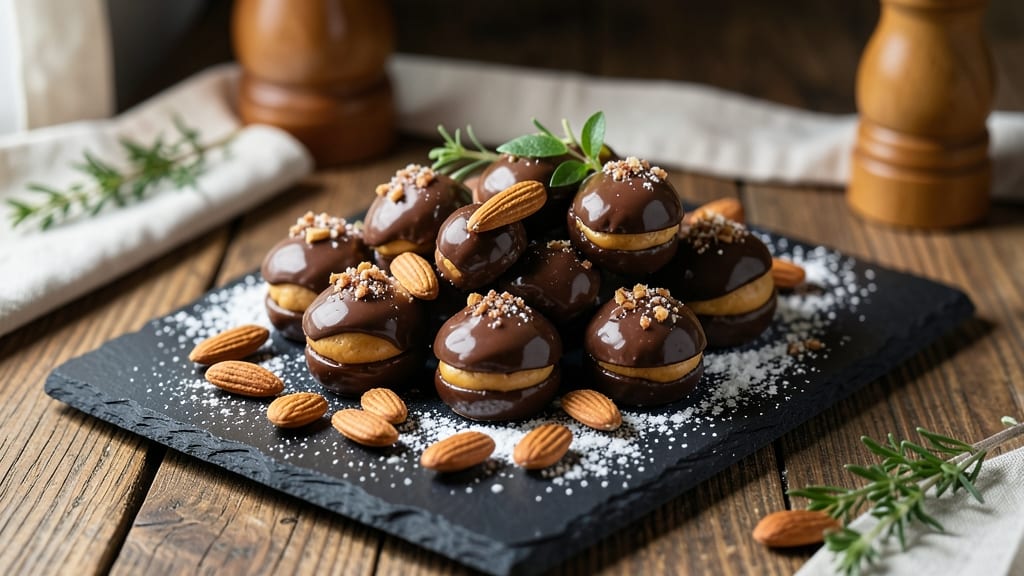
This no-bake Buckeye chocolate candy recipe transforms simple pantry staples into rich, creamy confections with a satisfying crunch. The secret lies in perfectly balanced peanut butter centers wrapped in velvety chocolate—no oven required.
I’ve refined this classic Ohio treat over years, ensuring every bite delivers that ideal contrast between smooth filling and crispy coating.
The process is straightforward but requires precision: roast peanuts until golden, mix them with peanut butter and powdered sugar for sturdy centers, then dip in melted chocolate for a glossy finish.
This version stays true to tradition while offering flexibility—swap dark for milk chocolate or use vegan alternatives without sacrificing texture. The result? Professional-quality candies that taste homemade.
What makes these Buckeyes special is their creamy peanut butter core, which stays firm enough to hold its shape while melting luxuriously in your mouth. The chocolate shell sets quickly when chilled, creating a satisfying snap that contrasts beautifully with the soft filling inside.
No special equipment needed—just patience and a steady hand for dipping.
Perfect for holidays, gifts, or satisfying cravings, these candies keep well in the fridge for up to two weeks. The recipe scales easily, making them ideal for parties or bulk prep. Let’s get started on this timeless treat that’s easier than it looks!
Ingredients for buckeye chocolate candy
Pantry staples transform into luxurious Buckeye candies with just a few precise steps.
| Ingredient | Amount | Notes |
|---|---|---|
| Peanuts, raw 🥜 | 2 cups | Unsalted, shelled, roasted to golden |
| Creamy Peanut Butter 🥜 | 1 cup | Natural, unsweetened preferred |
| Powdered Sugar 🍚 | 1 ½ cups | Confectioners' sugar, sifted |
| Vanilla Extract 🌿 | 1 tsp | Pure vanilla for authentic flavor |
| Milk Chocolate Chips 🍫 | 1 ½ cups | Semisweet or dark chocolate |
| Unsalted Butter 🧈 | ½ cup | Cut into small pieces |
| Vegetable Shortening 🧈 | ¼ cup | For firm chocolate coating |
| Granulated Sugar 🍚 | ¼ cup | For chocolate mixture |
| Cornstarch 🌾 | 1 tbsp | For chocolate smoothness |
| Coarse Sugar 🍚 | ½ cup | For rolling centers |
The peanuts are the foundation—roast them until golden for that classic Buckeye crunch. Costco or bulk bins offer the best value for unsalted peanuts, but any grocery store carries them. Look for natural peanut butter (no added oils or sweeteners) to keep the filling pure. The powdered sugar should be sifted to avoid lumps in the filling, and confectioners' sugar from Domino or Duncan Hines works perfectly. For the chocolate, Ghirardelli or Guittard chips melt smoothly, but store-brand is fine if it's high-quality.
No creamy peanut butter? Crunchy works too—just add 1 tbsp milk to smooth it out. Swap milk chocolate for dark chocolate (60% cocoa) if you prefer a richer flavor. Vegan chocolate chips (like Enjoy Life) work for plant-based versions. If you can't find coarse sugar, toss granulated sugar in a blender for 10 seconds to rough it up. The vanilla extract is non-negotiable—imitation vanilla won't cut it here. For the chocolate mixture, butter and shortening create a firm shell that snaps perfectly when chilled.
Store the finished candies in an airtight container between layers of parchment paper for up to 2 weeks in the fridge. Freeze for 1 month if prepping ahead. The chocolate coating softens at room temperature, so keep them chilled until serving. For gifting, pack in cellophane bags tied with ribbon—professional presentation makes them irresistible. Double the batch if hosting; these disappear fast.
Why You'll Love This Recipe
- No-Fuss Assembly: I swear by this recipe because it’s basically three ingredients plus chocolate—just mix, roll, and dip. No fancy tools, no waiting for dough to rest, just raw peanuts and peanut butter mashed together until it’s sticky enough to hold. Honestly, my first batch was a little messy, but now I do it in my sleep.
- Peanut Butter Bliss: That creamy peanut butter and vanilla combo? It’s like a warm hug in candy form. The powdered sugar gives it just enough sweetness to balance the rich chocolate, while the peanuts add that satisfying crunch. I’ll be real: I’ve been known to eat them straight from the bowl before they even hit the fridge.
- Party Magic: These are my go-to for holidays, teacher gifts, or just because. Wrap them in cellophane for a fancy touch, or leave them loose in a jar for casual snacking. My kids love them in their lunchboxes, and my husband sneaks them when he thinks I’m not looking. (Yes, even on a Tuesday night.)
- Budget-Friendly Stash: A bag of peanuts and a jar of peanut butter last me forever, and the chocolate chips stretch across multiple batches. Plus, they keep for weeks in the fridge—no freezer required. I make a big batch when peanut butter’s on sale, then pull them out whenever I need a quick treat. Solid move, if I do say so myself.
Step-by-step instructions for Buckeye chocolate candy
Here's the precise method for crafting classic Buckeye candies with perfect texture and flavor.
Prepare the Peanut Centers
Preheat your oven to 350°F and spread the 2 cups peanuts, raw evenly on a baking sheet. Toast them for 8-10 minutes until they're golden brown and fragrant—this enhances their natural flavor. Let them cool completely before handling, as warm peanuts will make the filling too soft to work with.
While the peanuts cool, combine the 1 cup creamy peanut butter, 1.5 cups powdered sugar, 1 tsp vanilla extract, and 0.5 cup unsalted butter in a medium bowl. Mix with a hand mixer or stand mixer on medium speed for 3-4 minutes until completely smooth and glossy. The mixture should be thick enough to hold its shape when dropped from a spoon but still pliable.
Once the peanut butter mixture reaches the right consistency, fold in the cooled peanuts using a rubber spatula. Work quickly but thoroughly to distribute the peanuts evenly. The filling should be thick enough to roll into balls without sticking to your fingers—if it's too soft, chill the mixture for 15 minutes to firm it up.
Form and Roll the Centers
Using a small cookie scoop or tablespoon, portion the peanut mixture into 1-inch diameter balls, rolling each one gently between your palms to create smooth, round centers. Place them on a parchment-lined baking sheet and refrigerate for 30 minutes to firm completely. This chilling step is critical—it prevents the centers from melting when you add the chocolate coating.
While the centers chill, prepare the chocolate mixture by combining 1.5 cups milk chocolate chips, 0.25 cup vegetable shortening, 0.25 cup granulated sugar, and 1 tbsp cornstarch in a microwave-safe bowl. Microwave in 30-second intervals, stirring between each interval, until the mixture is completely melted and smooth. The shortening helps create a firm, crackly coating that sets properly at room temperature.
Transfer the melted chocolate to a piping bag fitted with a small round tip. If you don't have a piping bag, a heavy-duty plastic bag with a small corner cut will work just as well. The chocolate should be thick enough to hold its shape when piped but still flow smoothly—if it's too thick, warm it gently in the microwave for 5-10 seconds and stir again.
Coat the Centers with Chocolate
Working quickly, pipe a 1-inch diameter ring of chocolate around the base of each chilled peanut center, leaving a small well in the center. Immediately roll each center in the 0.5 cup coarse sugar to create the signature crunchy exterior. The sugar should adhere to the chocolate but not melt it—if it does, chill the coated candies for 10 minutes before proceeding.
Place the sugar-coated candies on a wire rack set over a parchment-lined baking sheet. Let them sit at room temperature for 1-2 hours until the chocolate is completely set and firm to the touch. This waiting period is crucial—rushing will result in a sticky, messy coating that won't hold its shape.
Once fully set, transfer the Buckeye candies to an airtight container and store them at room temperature. They'll keep for up to 2 weeks, though I find they disappear much faster than that. The combination of creamy peanut filling, crispy sugar exterior, and smooth chocolate coating makes these candies irresistibly rich and satisfying.
Pro Tips For Making Buckeye Chocolate Candy
- Toast Peanuts First: Skip the raw nuts—lightly toast them in a dry pan over medium heat for 5-7 minutes until fragrant. This deepens their flavor and prevents that weird "peanutty" aftertaste when mixed with chocolate. (Yes, even if you’re impatient like me, don’t rush this—burnt peanuts ruin everything.)
- Measure Powdered Sugar Precisely: Use a kitchen scale for the powdered sugar—1 cup packed can weigh 120g, but loosely scooped it’s often 100g. Too much makes the mix dry; too little leaves it sticky. I learned this the hard way when my first batch turned into a peanut butter brick instead of candy.
- Chill the Mixture: Refrigerate the peanut butter-sugar-vanilla mix for 30 minutes before rolling. Cold ingredients bind better and roll cleaner, so you avoid sticky messes on your hands or the counter. (Pro move: Line your rolling surface with parchment—trust me, it’s worth it.)
- Melt Chocolate Slowly: Heat chocolate chips in 30-second bursts in the microwave, stirring between each, until just melted—no more than 1 minute total. Overheating seizes the chocolate, and you’ll be scraping burnt bits off the bowl. A double boiler works too, but the microwave is faster if you’re in a hurry.
Essential equipment for this dish
Essential Mixing Tools
Start with a stand mixer or hand mixer—I swear by my KitchenAid Artisan Series for the peanut butter mixture. The paddle attachment ensures smooth, lump-free filling, while the dough hook works if you prefer a stiffer texture.
For smaller batches, a hand mixer like Hamilton Beach 64040 does the job just as well. 🥜
Precision Measuring
Accurate measurements are key for perfect Buckeyes. Use a digital kitchen scale for the peanut butter and powdered sugar—OXO Good Grips is my go-to for its readability.
For dry ingredients like coarse sugar, a scoop or small measuring cup works best. A sifter for powdered sugar prevents clumps that ruin the filling’s texture.
Chocolate Melting Setup
For the chocolate coating, a microwave-safe bowl is non-negotiable—I use Pyrex for even heating. A piping bag with a round tip (or a heavy-duty plastic bag) ensures clean, even chocolate rings.
If you lack one, a small offset spatula helps spread chocolate manually. Double boiler method works too—place a heatproof bowl over a pot of simmering water, stirring until smooth.
Cooling and Rolling
Chill the peanut centers on a parchment-lined baking sheet—no sticking guaranteed. For rolling sugar-coated candies, a wire cooling rack (set over parchment) prevents soggy bottoms. A small silicone spatula helps transfer delicate candies without smudging. Parchment paper also lines storage containers to keep candies fresh.
Budget-Friendly Swaps
Skip the mixer? Use a fork or wooden spoon to mash the peanut butter mixture by hand—it’s labor-intensive but effective.
For chocolate melting, a double boiler (or even a heatproof bowl over boiling water) works without a microwave. Store-brand chocolate chips melt just as well as premium brands if they’re high-quality. A cookie scoop (or tablespoon) replaces a piping bag for shaping centers.
Nutrition facts
Frequently asked questions
Can I make Buckeye candies without a mixer?
While a mixer ensures smooth filling, you can achieve great results by hand. Use a fork or wooden spoon to vigorously mash the peanut butter, powdered sugar, butter, and vanilla together for 5-7 minutes until completely smooth. Work in a cool bowl to prevent melting, and fold in the peanuts by hand with a rubber spatula. The texture will be slightly less glossy but still delicious.
Why did my chocolate coating turn grainy?
Grainy chocolate usually means moisture or improper melting. Always use high-quality chocolate chips and ensure your bowl is completely dry. When melting, stir frequently and avoid overheating—microwave in 20-second bursts with thorough stirring between each. If it still looks grainy, strain the melted chocolate through a fine-mesh sieve before using.
Can I use almond butter instead of peanut butter?
Yes, but expect a different texture and flavor. Almond butter creates a smoother filling but lacks the classic peanut crunch. For best results, use a blend of almond butter and peanut butter (50/50 ratio) to maintain authenticity. The candies will still be delicious, though—just not traditional Buckeyes!
How do I fix soft centers that won't hold their shape?
Overmixed filling or insufficient chilling causes this common issue. First, ensure your peanut butter mixture is properly chilled (30 minutes) before rolling. If the centers still feel too soft, add 1-2 tablespoons more powdered sugar to absorb moisture and firm up the texture. For already-formed centers, refrigerate them an additional 15-20 minutes before coating.
What's the best way to store these candies for gifting?
For professional presentation, pack them in cellophane bags with a twist tie, then place in a decorative box. Store in an airtight container between layers of parchment paper to prevent sticking. Keep refrigerated until gifting day—this preserves the chocolate coating. For long-term storage (up to 3 months), freeze the candies in a single layer before transferring to an airtight container.