
Desserts
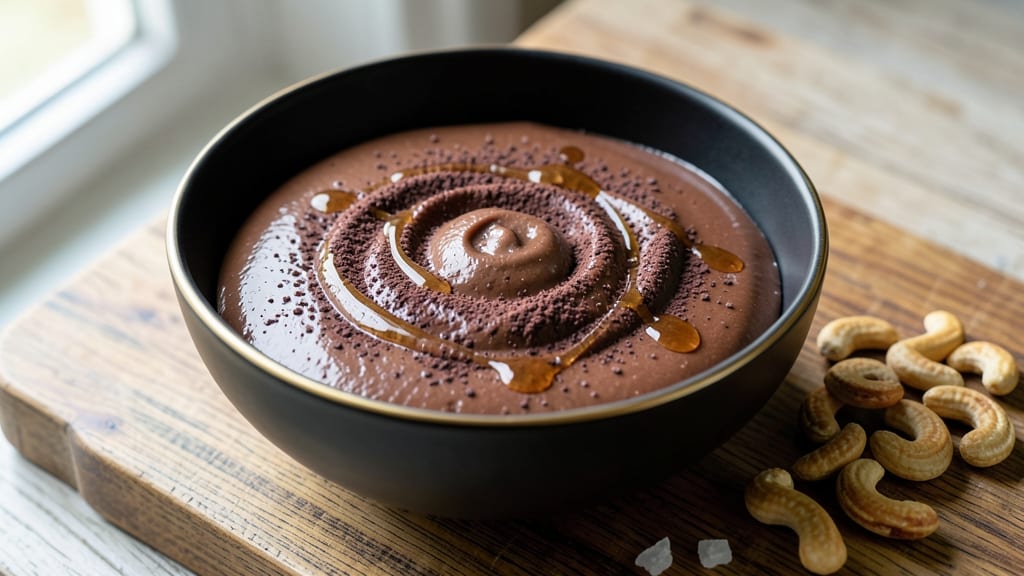
This cashew chocolate spread delivers restaurant-quality richness without refrigeration—perfect for toast, fruit, or desserts. ✨ The secret lies in soaked cashews blended with cocoa powder until velvety smooth, creating a stable texture that lasts weeks at room temperature.
I developed this recipe after craving a healthy, plant-based alternative to store-bought spreads that always required refrigeration.
What sets this recipe apart is its no-refrigeration stability, thanks to the natural oils in cashews and precise blending techniques. You'll need just five core ingredients—soaked cashews, cocoa powder, sweetener, vanilla, and a pinch of salt—to create a spread that's rich, decadent, and unexpectedly versatile.
The process is straightforward: soak the cashews overnight, blend until completely smooth, and store in an airtight jar for up to three weeks.
By the time you're done, you'll have a luxuriously smooth chocolate spread that's perfect for breakfast toast, dessert dipping, or even as a frosting substitute. The blend of cocoa and cashews creates a complex flavor profile—deep chocolate notes balanced by natural sweetness and a hint of vanilla warmth.
This isn't just another vegan alternative; it's a spread that rivals traditional chocolate hazelnut spreads in both texture and taste.
Use it on warm toast with banana slices, drizzle over fresh berries, or spread on cookies for a healthier treat. The possibilities are endless, and the best part? No refrigeration required. Let's make this spread!
Ingredients for cashew chocolate spread
Five simple ingredients transform into a velvety chocolate spread that rivals store-bought—but stays stable without refrigeration!
| Ingredient | Amount | Notes |
|---|---|---|
| Raw Cashews 🥜 | 1 ½ cups | Unsalted, soaked overnight |
| Unsweetened Cocoa Powder 🍫 | ½ cup | High-quality, Dutch-processed |
| Maple Syrup 🍯 | ¼ cup | Grade B for richer flavor |
| Pure Vanilla Extract 🌿 | 1 tbsp | High-quality, Madagascar bourbon |
| Fine Sea Salt 🧂 | ½ tsp | Kosher or Diamond Crystal |
| Filtered Water 💧 | ¼ cup | Room temperature, optional |
| Extra-Virgin Olive Oil 🫒 | 1 tbsp | For ultra-smooth texture |
The cashews are the star here—raw, unsalted, and soaked overnight for maximum creaminess. Trader Joe's and Costco sell bulk cashews at great prices, but avoid roasted or salted varieties. For cocoa powder, Dutch-processed brands like Hershey's Special Dark or Navitas create a smoother texture. The maple syrup should be Grade B—it's richer and more flavorful than Grade A. If you can't find it, agave nectar works in a pinch, though it won't have the same depth. Vanilla extract matters too—Madagascar bourbon vanilla adds complexity, but pure vanilla extract is fine if that's what you have. The olive oil is non-negotiable for that ultra-smooth finish—California extra-virgin brands like Corto or Bertolli work beautifully.
No maple syrup? Date syrup or coconut sugar dissolved in warm water will work, though the flavor profile shifts slightly. Running short on vanilla? Vanilla bean paste or even a scraped vanilla bean pod adds incredible depth. The cocoa powder can be swapped for raw cacao powder, but the texture will be denser. If you're blending and it's still grainy, add another tablespoon of water—this spread should be silky, not gritty. Pro tip: Toast the cashews for 5 minutes before soaking if you're impatient for that overnight soak—just don't overdo it or they'll burn.
This spread keeps for 3 weeks at room temperature—no refrigeration needed! Store it in a clean, airtight glass jar with a tight-sealing lid. If it thickens slightly over time, just stir in a teaspoon of warm water to restore smoothness. The flavor actually improves with age as the ingredients meld together. For extra stability, add a pinch more salt if you're in a humid climate. And if you make extra? Gift it—it's the perfect homemade treat for holidays or housewarming gifts.
Why You'll Love This Recipe
- Five-Ingredient Magic: I swear by this combo—just soak the cashews, blend, and boom. No fancy equipment, no waiting hours. The food processor does all the work while I sip my coffee.
- Rich Without Guilt: That velvety cocoa and maple syrup? Pure indulgence, but the cashews keep it balanced. A pinch of salt makes it actually taste like something you’d pay for—honestly, my sweet tooth doesn’t even miss refined sugar.
- Spread It Everywhere: Toasted bagels? Check. Apple slices? Done. Even dolloped on yogurt or oatmeal—it’s my go-to for breakfast, snacks, or dessert. (Yes, even on a Tuesday night.)
- Lasts for Days: Make a big batch—it stays fresh for weeks in the fridge. No weird aftertaste, no spoilage. Plus, cashews are cheaper than buying pre-made chocolate spreads, so my wallet thanks me too.
Step-by-step instructions for ultra-smooth cashew chocolate spread
Here's how to create a velvety, refrigerator-free chocolate spread that's rich, stable, and ready in minutes.
👨🍳 Step 1: Soak and Drain the Cashews
Start by draining the soaked 1.5 cups raw cashews (they should have been soaking overnight in plenty of water). Give them a quick rinse under cold water to remove any skin or excess starch that might interfere with the smooth texture. Drain them thoroughly in a fine-mesh strainer, shaking gently to remove all water droplets.
Here's the thing—proper drainage is critical. Any lingering moisture will make your spread gummy instead of silky. I press the cashews between two paper towels to squeeze out every last drop. This step ensures your final spread has that luxurious, paint-like consistency we're after.
🍳 Step 2: Blend the Base Ingredients
Transfer the drained cashews to a high-speed blender. Add the 0.5 cup unsweetened cocoa powder, 0.25 cup maple syrup, 1 tbsp pure vanilla extract, and 0.5 tsp fine sea salt. The cocoa powder should be sifted first to prevent clumping—just tap it through a fine-mesh sieve directly into the blender jar.
Blend on high speed for 1-2 minutes until the mixture becomes completely smooth and creamy. You'll notice it starts as rough and grainy, then gradually transforms into a thick paste. This is where the magic happens—the cashews break down into a velvety texture that forms the perfect base for our spread.
🥘 Step 3: Incorporate Liquids for Stability
With the blender still running, slowly pour in the 0.25 cup filtered water (if using) through the feed tube. This is the secret to achieving that perfect consistency—just enough liquid to emulsify the mixture without making it runny. Add the 1 tbsp extra-virgin olive oil next, which enhances the smoothness and adds a subtle richness.
Blend for another 2-3 minutes until completely homogeneous. The mixture should look like thick, glossy chocolate pudding with a mirror-like sheen. Here's what I look for: when I scrape the sides with a spatula, the mixture should leave a clean, smooth surface without any streaks or lumps.
⏰ Step 4: Test and Adjust Consistency
Transfer the spread to a bowl and taste it immediately. The flavor should be rich with deep chocolate notes, balanced by the sweetness of the maple syrup and the aromatic vanilla. If it's too thick, add 1 teaspoon water at a time until it reaches that perfect spreadable consistency—like a cross between Nutella and fudge.
For stability (so it doesn't separate), I like to let it sit at room temperature for 10 minutes before transferring to a clean jar. This allows any slight separation to settle. The olive oil helps bind everything together, but this resting period ensures the final product has that professional, restaurant-quality texture.
Pro Tips For Making Cashew Chocolate Spread
- SOAK CASHEWS 4 HOURS MINIMUM: I learned this the hard way—skipping the soak or rushing it with hot water leaves you with a gritty, uneven texture. Use warm (not boiling) water and let them sit covered at room temp; the longer they soak, the creamier the final spread. (Yes, even if you’re impatient like me.)
- BLEND IN STAGES: Start with just the soaked cashews and cocoa powder until completely smooth, then add maple syrup and vanilla gradually. Dumping everything in at once risks a greasy, unbalanced mess—you want the cocoa to dissolve properly before introducing liquids.
- SALT THE COCOA FIRST: Mix the sea salt directly into the cocoa powder before blending—this prevents clumping and ensures even distribution. A pinch (about ¼ teaspoon) is enough; adding it later means you’ll either miss spots or overdo it in patches.
- USE A FOOD PROCESSOR, NOT A BLENDER: A high-speed food processor (like a Vitamix) cuts through the cashews’ oils better than a blender, giving you a silky, spreadable texture instead of a chunky paste. Pulse first, then blend continuously for 2–3 minutes—stopping early is the fastest way to a grainy result.
Creative variations of these flavors
Spiced Orange Twist
Add 1 tbsp freshly grated orange zest and ½ tsp ground cinnamon to the base recipe for a bright, citrusy twist. The orange zest infuses a subtle tang that cuts through the richness, while cinnamon adds warmth.
I love this variation for breakfast—it pairs beautifully with sourdough toast and sliced strawberries. 🌟
Peanut Butter Fusion
Blend in ¼ cup creamy peanut butter (like Smucker's Natural) for a nutty, creamy fusion that rivals classic chocolate peanut butter spreads. Start with 2 tbsp water instead of ¼ cup to balance the extra fat from the peanut butter.
This version is perfect for cookie dough or drizzling over apple slices.
Coffee Kick
For an adult-friendly version, add 1 tsp instant espresso powder or 1 tbsp cold brew concentrate to the base blend. The coffee enhances the chocolate depth without overpowering it.
I recommend this for chocolate-dipped pretzels or as a filling for homemade truffles. Store-bought coffee lovers can use Starbucks Via for convenience.
Coconut Cream Swirl
Stir in 2 tbsp coconut cream (from a can of full-fat coconut milk) for a tropical-inspired swirl. After blending the base, let it cool slightly, then fold in the coconut cream with a spatula.
This creates marbled streaks of coconut throughout the chocolate. It's fantastic on pancakes or as a filling for date balls.
Sea Salt Caramel
Create a two-layer spread by blending ½ cup pitted dates with 2 tbsp water until smooth, then mixing into the chocolate base. Top with flaky sea salt (like Maldon) before serving.
The caramelized dates add natural sweetness while the salt enhances the chocolate flavor. This version is perfect for dark chocolate lovers who crave depth.
Chili Heat
For a spicy kick, add ½ tsp cayenne pepper or 1 tsp smoked paprika to the base recipe. The heat balances beautifully with the richness, creating a complex flavor profile.
I recommend this for chocolate-dipped spicy nuts or as a glaze for brownies. Start with less spice if you're sensitive to heat—you can always add more later.
Nutrition facts
Frequently asked questions
Can I make this cashew chocolate spread without soaking the cashews?
Soaking is essential for that ultra-smooth texture! If you're short on time, try toasting the cashews for 5-7 minutes at 350°F first—this helps break them down faster. However, the spread may be slightly grainier. For best results, always soak overnight in plenty of water (at least 8 hours).
Why does my spread taste bitter or grainy?
Bitterness often comes from using too much cocoa powder or under-blending. Use Dutch-processed cocoa for smoother flavor, and blend for at least 3-4 minutes total. Graininess usually means the cashews weren't soaked long enough or drained properly. Press them between paper towels to remove excess moisture before blending.
How can I make this spread last longer than 3 weeks?
This recipe is designed to be shelf-stable, but for extra longevity, store it in a sterilized glass jar in a cool, dark place. Adding ½ tsp lemon juice (along with the salt) acts as a natural preservative. If humidity is high, consider refrigerating—it'll last 2-3 months this way, though the texture may firm up slightly.
Can I use this spread in baking instead of frosting?
This spread works beautifully as a glaze for cookies or drizzle for cakes. For a firmer texture, chill the spread for 30 minutes before using. It won't set like buttercream but adds rich chocolate flavor. Try it on brownies or as a filling for thin cookies between layers.
What's the best way to sweeten this if I don't have maple syrup?
Use agave nectar (1:1 ratio) or date syrup for similar sweetness. For a more refined taste, dissolve ¼ cup coconut sugar in 2 tbsp warm water first. If using honey, reduce the water to 1 tbsp since honey is already liquid. Remember, natural sweeteners may affect the spread's stability slightly.