
Desserts
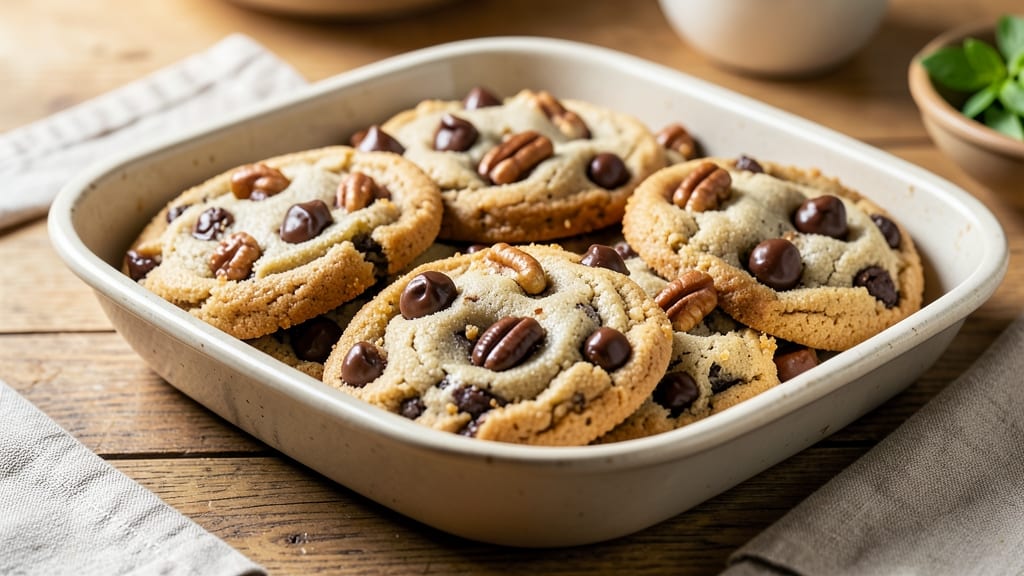
This chewy chocolate chip walnut cookies recipe delivers the perfect balance of nutty crunch and gooey chocolate rivers—every bite is a revelation. 💛 The secret lies in using brown butter for depth and letting the dough rest overnight, which transforms ordinary cookies into something extraordinary.
I've baked these for years, and they never fail to disappear from the cookie jar.
What sets these apart is the combination of rich brown butter, crisp walnuts, and melty chocolate chips that create that signature chewy texture with crisp edges. The dough is simple to mix but requires patience—allowing it to chill for at least 12 hours develops the flavors and prevents spreading.
This isn't your average cookie recipe; it's a foolproof method for cookies that taste like they came from a bakery.
By the time they emerge from the oven, you'll have golden-brown cookies with crackly walnuts and rivers of chocolate oozing through the centers. The aroma alone will have everyone gathering in the kitchen, and the first bite delivers that perfect balance of sweet, salty, and nutty flavors.
These cookies stay fresh for days, making them ideal for holidays, gifts, or satisfying that afternoon craving.
For an extra touch, sprinkle a pinch of flaky sea salt on top before baking—it enhances all the flavors and takes these cookies to the next level.
Whether you're baking for a crowd or treating yourself, this recipe delivers results that will have you reaching for the dough immediately after the first batch.
Ingredients for chewy chocolate chip walnut cookies
Rich brown butter, toasted walnuts, and melty chocolate chips—these 11 ingredients create cookies that disappear fast.
| Ingredient | Amount | Notes |
|---|---|---|
| Unsalted Butter 🧈 | 1 cup | Browned for nutty flavor |
| Granulated Sugar 🍚 | ¾ cup | White or light brown |
| Packed Brown Sugar 🍚 | ¾ cup | Dark brown preferred |
| Large Eggs 🥚 | 2 whole | Room temperature |
| Pure Vanilla Extract 🌿 | 1 tbsp | High-quality preferred |
| All-Purpose Flour 🌾 | 2 ½ cups | Sifted for light texture |
| Baking Soda 🧂 | ½ tsp | Pure baking soda |
| Salt 🧂 | ½ tsp | Fine sea salt |
| Chopped Walnuts 🥜 | 1 ½ cups | Toasted for extra flavor |
| Semi-Sweet Chocolate Chips 🍫 | 2 cups | High-quality chips |
| Flaky Sea Salt 🧂 | 1 tsp | For finishing |
The butter is non-negotiable—brown it until it smells nutty and deep (about 5 minutes). Land O'Lakes or Plugrá are my go-tos, but any unsalted works. Toast the walnuts in a dry pan for 3-4 minutes until fragrant—they add serious crunch. For chocolate, Ghirardelli or Enjoy Life chips melt perfectly. The vanilla? Nielsen-Massey is worth the splurge, but any pure extract does the trick. Flour should be sifted to avoid dense cookies—measure carefully, these recipes aren't forgiving.
No walnuts? Pecans or hazelnuts work in a pinch (toast them too!). Out of chocolate chips? Chopped chocolate bars or even white chocolate chips add a nice twist. Brown sugar substitutes? White sugar plus 1 tsp molasses mimics the moisture. The dough needs to rest overnight—this isn't optional. If you're impatient, chill it for at least 4 hours. For extra richness, swap 2 tbsp of the butter for nut butter (almond or peanut). And if you're feeling fancy, fold in dark chocolate chunks for deeper flavor.
Brown butter smells amazing but hardens fast—cool it completely before mixing. Store dough in the fridge for up to 3 days or freeze for 3 months (wrap tightly!). Baked cookies stay fresh for 5 days in an airtight container, but they're best eaten within 2 days. For gifting, freeze fully baked cookies on a tray, then transfer to bags. The salt on top? Sprinkle it right after baking—it melts slightly and enhances every flavor. These cookies reheat beautifully—just 10 seconds in the microwave to revive that bakery-fresh aroma.
Why You'll Love This Recipe
- No-Fuss Mixing: I swear by the 30-second creaming method—just butter, sugars, and vanilla until it’s light and fluffy. No food processor, no stress, just a sturdy spoon and 10 minutes of your life.
- Crunch-Meets-Chew Magic: That perfect balance of crisp walnut edges and gooey chocolate pockets? It’s all in the texture—underbaked just enough so every bite has that warm, melty center. Honestly, I’ve tried fancier cookies, but these always win.
- Holiday or Snack Attack: Double the dough, freeze half, and you’ve got cookies for Thanksgiving, teacher gifts, or a 3 p.m. sugar craving. (Yes, even on a Tuesday night.) The walnuts add sophistication without extra effort.
- Budget-Friendly Staples: Butter, sugar, eggs—ingredients you already have lurking in your pantry. No specialty items, no markup, just pure, reliable comfort that costs less than takeout. My wallet thanks me every time.
Step-by-step instructions for chewy chocolate chip walnut cookies
Here's how to make cookies with that perfect chewy center and crispy edges—every bite packed with nutty crunch and melty chocolate.
🍳 Step 1: Brown the Butter for Maximum Flavor
Melt the 1 cup unsalted butter in a light-colored saucepan over medium heat. Watch closely as it foams and bubbles—this is your signal to reduce the heat to low. Let it cook until it turns a golden brown color with nutty aroma, about 5-7 minutes. Be careful not to burn it; remove from heat as soon as it smells toasty.
Let the browned butter cool for 10 minutes while you prepare the rest. This step adds incredible depth of flavor that regular butter can't match. I promise you'll notice the difference—it's worth the extra effort!
👨🍳 Step 2: Cream the Butter and Sugars
In a stand mixer fitted with the paddle attachment, beat the cooled browned butter with the 0.75 cup granulated sugar and 0.75 cup packed brown sugar on medium speed for 3-4 minutes. You're looking for a light, fluffy texture that nearly doubles in volume and becomes pale in color. This creaming process incorporates air, which creates those beautiful crackly tops and helps the cookies spread just enough.
Here's the thing—don't rush this step. Under-creamed butter leads to dense cookies instead of chewy ones. You'll know it's ready when the mixture looks light and airy, almost like whipped cream.
👨🍳 Step 3: Add Eggs, Vanilla, and Dry Ingredients
Add the 2 whole large eggs one at a time, mixing on low speed for 30 seconds after each addition until fully incorporated. Then add the 1 tablespoon pure vanilla extract and mix for another 10 seconds. The mixture might look slightly curdled, but that's normal.
In a separate bowl, whisk together the 2.5 cups all-purpose flour, 0.5 teaspoon baking soda, and 0.5 teaspoon salt. With the mixer on low speed, gradually add the dry ingredients to the wet mixture until just combined—you should still see a few flour streaks. Over-mixing develops gluten and makes cookies tough.
🥘 Step 4: Fold in Walnuts and Chocolate Chips
Remove the bowl from the mixer and gently fold in the 1.5 cups chopped walnuts and 2 cups semi-sweet chocolate chips using a silicone spatula. Make sure they're evenly distributed throughout the dough. I like to press the walnuts into the dough slightly so they stay embedded when the cookies bake.
This is where the magic happens—those toasted walnuts and chocolate chips create the perfect texture contrast. If you're using pre-toasted walnuts, they'll add even more flavor. Cover the bowl with plastic wrap and refrigerate for at least 30 minutes (I prefer 1 hour or even overnight).
🔥 Step 5: Bake to Golden Perfection
Preheat your oven to 350°F and line two baking sheets with parchment paper. Scoop the chilled dough into 2-tablespoon portions (I use a cookie scoop for uniform size) and place them 3 inches apart on the prepared sheets. The dough will be cold and firm—this is normal.
Bake for 11-13 minutes until the edges are golden brown but the centers still look slightly underdone. They'll continue cooking on the hot pan after you remove them from the oven. Let them cool on the baking sheet for 5 minutes before transferring to a wire rack.
🍽️ Step 6: Finish with Flaky Sea Salt
While the cookies are still warm, sprinkle each one with a pinch of flaky sea salt. This final step adds a sophisticated contrast to the sweet, nutty, chocolatey goodness. Let them cool completely before storing in an airtight container.
These cookies are best enjoyed warm, straight from the oven. The centers should be soft and chewy, with crisp edges and pockets of melty chocolate and crunchy walnuts. Trust me, they're worth every minute of effort!
Pro Tips For Making Chewy Chocolate Chip Walnut Cookies
- Chill the Dough Longer: I learned this the hard way—skipping the 24-hour fridge rest makes for flat, cakey cookies. Use a sealed container and let it sit overnight (or at least 12 hours) so the butter firms up and the flavors meld. Trust me, your cookies will thank you with that perfect chewy center.
- Toast the Walnuts: Skip the raw nuts—toss chopped walnuts in a dry skillet over medium heat for 3-4 minutes until golden and fragrant. This adds depth and prevents them from turning soggy. (Yes, even if you’re impatient like me, wait until they smell amazing.)
- Use Room-Temp Butter: Cold butter creates tough cookies, but melted butter spreads too much. Let the butter sit out for 30-45 minutes until soft but still holds its shape when pressed. This guarantees thick, chewy cookies that hold their shape without cracking.
- Bake One Sheet at a Time: Resist the urge to overcrowd the pan—leave at least 2 inches between dough balls. If you’re baking multiple sheets, stagger their start times so the oven recovers its heat. Uneven baking is the fastest way to ruin a perfect batch.
Dietary considerations for this chewy chocolate chip walnut cookies
Gluten-Free Adaptation
For a gluten-free version, replace the 2.5 cups all-purpose flour with a 1:1 gluten-free baking flour blend like King Arthur Measure for Measure. Add 1 teaspoon xanthan gum to help bind the dough—this is crucial for maintaining that signature chewy texture.
Chill the dough for 24 hours to ensure proper flavor development, as gluten-free doughs can be more delicate. 🌱
When baking, reduce the oven temperature to 325°F and increase baking time by 1-2 minutes to prevent over-browning. These cookies will be slightly denser but still packed with that nutty, chocolatey goodness. Store them in an airtight container with parchment paper between layers to prevent sticking.
Nut-Free Option
Skip the walnuts entirely and boost the chocolate content by adding ½ cup extra chocolate chips or ¼ cup chopped dark chocolate. For extra richness, fold in ¼ cup toasted pecans if you want a different nutty flavor.
If avoiding all nuts, consider adding ½ cup dried cranberries or white chocolate chips for texture contrast. 🥜
To maintain the chewy texture without nuts, ensure your chocolate chips are high-quality and melt beautifully during baking. The brown butter and extra chocolate will compensate for the missing crunch, creating a decadent treat that still satisfies that cookie craving.
Vegan Substitutions
Replace the 1 cup butter with 1 cup vegan butter (like Miyoko's or Earth Balance) and brown it in the same way. For the eggs, use 2 flax eggs (2 tablespoons ground flaxseed + 6 tablespoons water) or ¼ cup unsweetened applesauce.
The vanilla extract remains the same. 🌿
Use a vegan chocolate chip brand like Enjoy Life or Pascha for melting perfection. For the baking soda, ensure it's aluminum-free (like Bob's Red Mill) to avoid any metallic aftertaste. These vegan cookies will still deliver that chewy texture and rich flavor—just as satisfying as the original!
Lower Sugar Option
Reduce the 0.75 cup granulated sugar to 0.5 cup and the 0.75 cup brown sugar to 0.5 cup, replacing the difference with 0.25 cup unsweetened applesauce or 0.25 cup mashed banana. This keeps the moisture while cutting back on sweetness. 🍎
Balance the flavor by adding ½ teaspoon cinnamon or ¼ teaspoon espresso powder to enhance the chocolate and nutty notes. The cookies will still be chewy but slightly less sweet, making them a better option for those watching their sugar intake.
Allergen-Friendly Tips
For a dairy-free version, use vegan butter and ensure your chocolate chips are dairy-free. If someone has a soy allergy, check your vanilla extract for soy additives—some brands include it.
For egg-free baking, flax eggs work best while maintaining texture. Always double-check labels on all ingredients to avoid cross-contamination. ✨
When baking for allergies, use separate utensils and baking sheets to prevent cross-contamination. Store allergen-friendly cookies in sealed containers with clear labels. These adaptations ensure everyone at the table can enjoy the same delicious cookies without worry.
Nutrition facts
Frequently asked questions
Why does the dough need to rest overnight?
Resting the dough for at least 12 hours (or up to 3 days) allows the flour to hydrate properly and flavors to develop fully. This prevents excessive spreading when baking and creates that signature chewy texture. The brown butter flavor also deepens during this time—it's worth the wait!
Can I make these cookies without walnuts?
Simply omit the walnuts and add ½ cup extra chocolate chips or ¼ cup chopped dark chocolate for richness. For texture contrast, try ½ cup dried cranberries or white chocolate chips. The chewy texture will still shine through—just without the crunch.
How do I prevent my cookies from spreading too much?
Chill the dough thoroughly for 24 hours and use a 2-tablespoon scoop for consistent size. Place cookies 3 inches apart on baking sheets and avoid overbaking—remove them when edges are golden but centers still look soft. The residual heat will finish cooking them perfectly.
What's the best way to store leftover cookies?
Keep them fresh in an airtight container at room temperature for 5 days or freeze for up to 3 months. For freezing, place baked cookies on a tray first to prevent sticking. Reheat in a 350°F oven for 5 minutes to revive their warm, gooey texture.
Can I use white chocolate chips instead?
Yes, but expect a sweeter, creamier flavor profile. For balance, reduce the amount to 1.5 cups and add ½ cup dark chocolate chips (60% cocoa). The contrast between the two chocolates enhances the overall taste. White chocolate melts differently, so check cookies at 10 minutes to prevent over-browning.