
Desserts
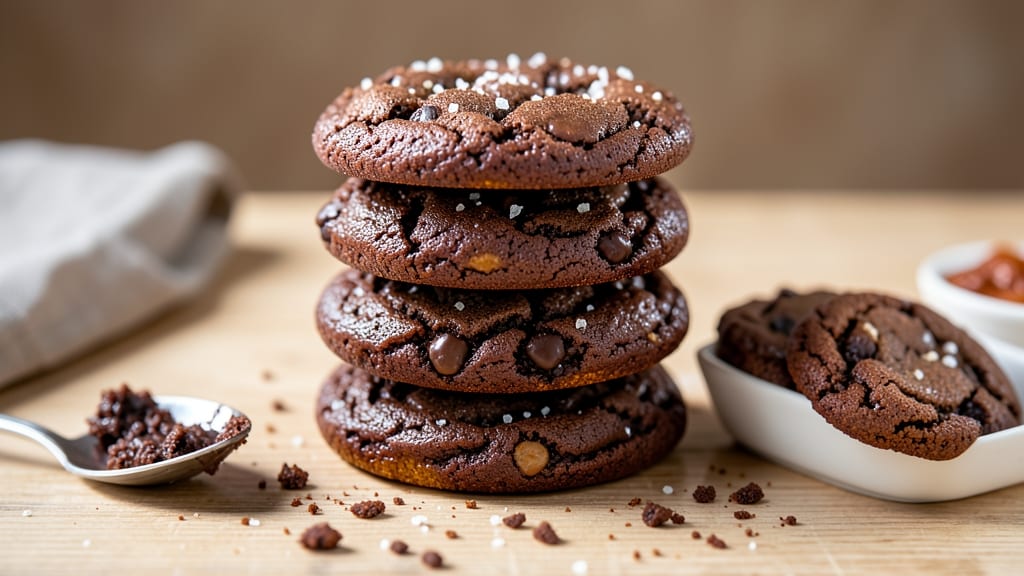
This chewy triple chocolate cookies recipe delivers the ultimate indulgence—crackly edges, molten chocolate pockets, and a fudgy center that melts in your mouth. 💛 I've perfected this version over years of baking, ensuring every bite has that signature triple-chocolate richness without being too sweet.
The secret lies in the right balance of cocoa powder, chocolate chips, and a touch of brown sugar for depth.
What sets these cookies apart is the texture: chewy yet sturdy, with a crisp exterior that gives way to a gooey chocolate core. The recipe uses both semisweet and dark chocolate chips for complexity, plus a hint of espresso powder to enhance the chocolate flavor.
No fancy equipment needed—just a bowl, a spoon, and your oven.
By the time they emerge from the oven, your kitchen will smell like a chocolate factory, and the cookies will be warm, glossy, and impossible to resist. The edges stay crisp while the centers remain soft, with pockets of melted chocolate that make them worth every calorie.
These are the kind of cookies that disappear in minutes.
Perfect for holidays, gift-giving, or satisfying a chocolate craving, this recipe makes two dozen cookies that taste even better the next day. Let's get baking—your taste buds won't regret it.
Ingredients for chewy triple chocolate cookies
Here's what you need for chewy, triple-chocolate cookies with crackly edges and molten centers—worth every bite.
| Ingredient | Amount | Notes |
|---|---|---|
| Unsalted Butter 🧈 | 1 cup | Cold, cubed for even mixing |
| Granulated Sugar 🍚 | 1 cup | White or light brown |
| Packed Brown Sugar 🍚 | ½ cup | Dark brown for depth |
| Dutch-Processed Cocoa Powder 🍫 | ¾ cup | High-quality for rich flavor |
| Large Eggs 🥚 | 2 whole | Room temperature for blending |
| Vanilla Extract 🌿 | 2 tsp | Pure, high-quality extract |
| Espresso Powder ☕ | 1 tsp | Enhances chocolate flavor |
| Semisweet Chocolate Chips 🍫 | 1 ½ cups | High-quality baking chips |
| Dark Chocolate Chips 🍫 | 1 ½ cups | 60% cocoa or higher |
| All-Purpose Flour 🌾 | 2 ½ cups | Sifted for light texture |
| Baking Soda 🧂 | ½ tsp | Fresh for best rise |
| Salt 🧂 | ½ tsp | Fine sea salt preferred |
| Flaky Sea Salt 🧂 | 1 tbsp | For sprinkling on top |
The cocoa powder and chocolate chips are non-negotiable here—Hershey's Special Dark or Valrhona cocoa powder take these to the next level, but Nestlé Natural Cocoa works in a pinch. I always grab the Ghirardelli baking chips at Whole Foods for that extra richness, but Ghirardelli or Nestlé chips from any grocery store do the job. The espresso powder might sound odd, but it deepens the chocolate flavor without adding bitterness—Starbucks or Lavazza are my go-tos, but any quality instant espresso works. For the butter, Plugrá or Land O'Lakes are reliable, but European-style unsalted like Miyoko's gives a better flavor if you're willing to splurge.
No cocoa powder? Melted dark chocolate at half the amount works in a bind, though texture will differ slightly. Running low on semisweet chips? Swap half with milk chocolate chips—just know the flavor will be sweeter. The baking soda must be fresh; if it's more than a year old, replace it or you'll get flat cookies. For a nutty twist, fold in 1/2 cup chopped walnuts or pecans before baking. The flaky sea salt is optional but worth it—Maldon is the gold standard, but Trader Joe's has a great budget-friendly alternative. If you're gluten-free, King Arthur gluten-free flour blend works well, but texture will be slightly different.
Store dough in an airtight container in the fridge for up to 4 days—it actually improves with time. Baked cookies keep at room temperature for 5 days in an airtight container, though they'll lose that perfect chewiness after 2 days. For longer storage, freeze baked cookies for up to 3 months—wrap them individually in plastic wrap to prevent drying. Reheat in a 350°F oven for 2-3 minutes to restore that gooey center. These cookies freeze beautifully too—bake them, cool completely, then freeze on a tray before transferring to a bag. Pull out just what you need, and they'll taste fresh.
Why You'll Love This Recipe
- No Mixer Needed: I swear by this—just cream the butter and sugars by hand until light, then fold in the cocoa. The dough comes together faster than you can say "chocolate overload," and honestly? The effort is worth every second.
- Rich Without Bitterness: That Dutch-processed cocoa is the star—it’s smooth, deep, and never overpowering. The combo of brown and granulated sugar keeps it perfectly balanced, so you get that classic triple-chocolate taste without a hint of chalkiness.
- Bakes Like a Dream: These hold up for days in an airtight container, but they’re also the perfect last-minute treat. Toss a batch in the oven while you’re waiting for dinner to cook, and boom—warm, gooey cookies ready in 12 minutes.
- Budget-Friendly Luxury: Butter, sugar, eggs, cocoa—these are all pantry staples that won’t break the bank. I’ve made 24 of these for under $5, and they disappear faster than my willpower on a bad day. (Yes, even on a Tuesday night.)
Step-by-step instructions for chewy triple chocolate cookies
Here's how to bake decadent cookies with crackly edges and molten chocolate pockets every time.
🍳 Step 1: Cream Butter and Sugars to Peak Fluffiness
In a stand mixer fitted with the paddle attachment, beat the 1 cup unsalted butter (cold, cubed) with the 1 cup granulated sugar and 0.5 cup packed brown sugar on medium speed for 3-4 minutes. You'll know it's ready when the mixture nearly doubles in volume and turns pale, almost buttery in color. This creaming process incorporates air, which creates those signature crackly edges and ensures a tender crumb.
I like to scrape down the sides of the bowl with a spatula every 30 seconds to make sure everything gets evenly incorporated. The butter should be fully emulsified with the sugars—no more visible chunks—and the texture should be light and airy. This step is your foundation for chewy cookies, so don't rush it. If you're mixing by hand, use a hand mixer and increase the time to 4-5 minutes for the same result.
👨🍳 Step 2: Add Eggs, Vanilla, and Espresso Powder
Add the 2 whole large eggs (room temperature) one at a time, mixing on low speed for 30 seconds after each addition. Then stir in the 2 teaspoons vanilla extract and 1 teaspoon espresso powder. The espresso powder might seem odd, but it enhances the chocolate flavor beautifully—think of it as a secret weapon for deeper chocolate notes.
After adding the eggs, the mixture might look slightly curdled, but don't worry. The dry ingredients will smooth everything out. Here's the thing—room temperature eggs blend more easily and create a smoother dough. If your eggs are cold, let them sit at room temperature for 10-15 minutes before using. The mixture should be thick but pourable at this stage, like a rich cookie batter.
👨🍳 Step 3: Fold in Cocoa Powder and Dry Ingredients
In a separate bowl, whisk together the 2.5 cups all-purpose flour, 0.5 teaspoon baking soda, and 0.5 teaspoon salt. Sift the mixture into the wet ingredients and mix on low speed for 30-45 seconds until just combined. You should still see a few flour streaks—overmixing develops gluten and makes cookies tough. This is where the 0.75 cup Dutch-processed cocoa powder comes in. Add it now and mix until fully incorporated.
Remove the bowl from the mixer and fold in the 1.5 cups semisweet chocolate chips and 1.5 cups dark chocolate chips by hand using a silicone spatula. I use a mix of both for depth of flavor—semisweet for classic sweetness and dark for that rich, bittersweet contrast. Make sure the chocolate chips are evenly distributed throughout the dough. The dough should be thick, sticky, and hold its shape when scooped. If it feels too dry, add 1-2 teaspoons of milk to bring it together.
⏰ Step 4: Chill the Dough (This Step Changes Everything)
Cover the bowl with plastic wrap and refrigerate for at least 1 hour (I prefer 2 hours or even overnight). Chilling the dough is non-negotiable—it solidifies the butter, which prevents the cookies from spreading too thin in the oven. It also allows the flour to fully hydrate, creating a better texture. Cold dough also means the cookies hold their shape better, resulting in thicker cookies with crispy edges and gooey centers.
Here's a pro tip: if you're short on time, pop the dough in the freezer for 30 minutes instead. Just make sure it's fully chilled before scooping. The dough should be firm enough to hold its shape when you scoop it onto the baking sheet. If it's too soft, chill for another 15-20 minutes. Trust me, this step makes a MASSIVE difference in the final result.
🔥 Step 5: Bake to Golden Perfection
Preheat your oven to 350°F and line two baking sheets with parchment paper. Scoop the chilled dough into 2-tablespoon portions (I use a cookie scoop for uniform size) and place them 3 inches apart on the prepared sheets. Sprinkle each cookie with a pinch of the 1 tablespoon flaky sea salt—this adds a burst of flavor that balances the sweetness.
Bake for 11-13 minutes until the edges are golden brown but the centers still look slightly underdone. They'll continue cooking on the hot pan after you remove them from the oven. Let them cool on the baking sheet for 5 minutes before transferring to a wire rack. The cookies should be soft in the middle with crackly edges and pockets of molten chocolate. If you're impatient like me, I know it's hard to wait, but resist the urge to eat them straight from the oven—they'll firm up as they cool.
Pro Tips For Making Chewy Triple Chocolate Cookies
- Cream Butter Slowly: I used to dump cold butter into the sugar mix and wonder why my dough stayed clumpy. Instead, soften the butter to room temperature first—press a thumbprint into it, and if it springs back, let it sit another 10 minutes. Then, mix it into the sugars with a wooden spoon until no dry bits remain. This isn’t just about texture; it’s how you get that signature chew without grittiness.
- Sift That Cocoa: Dutch-processed cocoa powder is finicky—it loves to clump like a teenager avoiding chores. Sift it twice through a fine-mesh sieve before measuring, and sift it again right into your mixing bowl. I learned this the hard way when my first batch had weird, dense pockets where the cocoa hadn’t distributed evenly. Trust me, your cookies will thank you with even, rich flavor.
- Underbake Slightly: Triple chocolate cookies are deceptive—they look done when the edges are golden, but the center stays soft for minutes after pulling them from the oven. Test with a toothpick: it should come out with moist crumbs, not clean. If you pull them too soon, they’ll harden as they cool, and you’ll lose that melt-in-your-mouth chew. Let them rest on the sheet for 5 minutes first, then transfer.
- Chill the Dough: Skipping the 24-hour (or even 4-hour) fridge rest is tempting, but it’s the thing that matters most for texture. Cold dough prevents excessive spreading, and the flavors meld into something deeper. Roll the dough into 1.5-inch balls, flatten slightly, and refrigerate them covered on a tray. When baking, pull them out just before the oven—no need to thaw. Your cookies will hold their shape and stay chewy longer.
Wine and beer pairings for chewy triple chocolate cookies
Rich Chocolate Wines
Pair these decadent cookies with a bold red wine that complements their deep chocolate notes. A Cabernet Sauvignon from Napa Valley—like Opus One or Caymus Vineyards—works beautifully. The wine's dark fruit flavors and tannins mirror the chocolate's richness, while its acidity cuts through the sweetness.
I love sipping a glass of 2018 Caymus Vineyards Cabernet Sauvignon alongside these cookies—their shared intensity makes every bite feel like a luxurious experience. 🍷
Port Wine Magic
For a dessert-focused pairing, tawny Port is my go-to. The nutty, caramelized flavors in an aged tawny Port (like Graham's 10-Year-Old) enhance the cookies' chocolate depth while adding a warm, toasty note.
Serve it slightly chilled—around 60°F—to let its complexity shine. A small glass after dinner or with a late-night cookie is pure indulgence. 🥂
Creamy Dessert Wines
If you prefer white wines, a Chardonnay with enough body to stand up to the chocolate will do the trick. Look for a buttery, oak-aged Chardonnay from California, like Kendall-Jackson Grand Cru.
The wine's vanilla and caramel notes harmonize with the cookies' brown sugar and chocolate chips. For a lighter option, a Viognier with its floral and stone fruit flavors provides a refreshing contrast. 🍇
Beer Pairings
Craft beer lovers, don’t worry—there’s a perfect match for you too! A stout like Guinness or Founders Kentucky Breakfast Stout pairs surprisingly well with the cookies' chocolate intensity. The coffee and roasted malt notes in the beer complement the espresso powder in the cookies.
For a lighter option, try a Belgian dubbel like Westmalle Dubbel—its caramel and dark fruit flavors bridge the gap between sweet and bitter. 🍺
Coffee Liqueur Twist
For a non-alcoholic or boozy twist, serve the cookies with a side of Kahlúa or Tia Maria. Drizzle a little over the warm cookies to enhance their chocolatey richness.
If you're feeling fancy, mix 1 oz Kahlúa, 1 oz dark rum, and a splash of cream in a mug for a quick chocolate coffee cocktail. The caffeine in the liqueur also helps balance the sweetness. ☕
Nutrition facts
Frequently asked questions
Why do these cookies need to chill for so long?
Chilling the dough for at least 1 hour (or overnight) is essential for two reasons: it solidifies the butter to prevent excessive spreading, and it lets the flour fully hydrate for that perfect chewy texture. Without chilling, your cookies will flatten out and lose their signature crackly edges and gooey centers.
Can I substitute white chocolate chips?
While you can use white chocolate chips, I recommend sticking with semisweet and dark chocolate for the best flavor balance. If you must substitute, replace half the semisweet chips with white chocolate—just know the cookies will be sweeter overall. The espresso powder and cocoa powder already provide enough depth for a rich chocolate experience.
How do I get the cookies to be extra gooey?
For maximum gooeyness, underbake slightly by removing the cookies when the edges are just golden (11 minutes instead of 13). Let them cool on the baking sheet for 5 minutes before transferring—this traps heat and keeps the centers soft. Pro tip: Add 1 tablespoon of corn syrup to the dough for extra moisture and chewiness.
What if my dough is too sticky?
If the dough feels too sticky, refrigerate it for an extra 30-60 minutes to firm up. If it's still too wet, add 1 tablespoon of flour at a time until it holds its shape when scooped. Overworking the dough can make it tough, so handle it gently. For extra insurance, chill the dough balls for 15 minutes on the baking sheet before baking.
Can I make these cookies gluten-free?
Yes! Replace the all-purpose flour with a 1:1 gluten-free baking flour blend (like King Arthur or Bob's Red Mill). Add 1 teaspoon of xanthan gum to help bind the dough. Texture will be slightly different—expect a denser cookie—but the flavor will still be rich and chocolatey. For best results, use a gluten-free measuring cup to avoid packing too much flour.