
Soups & Stews
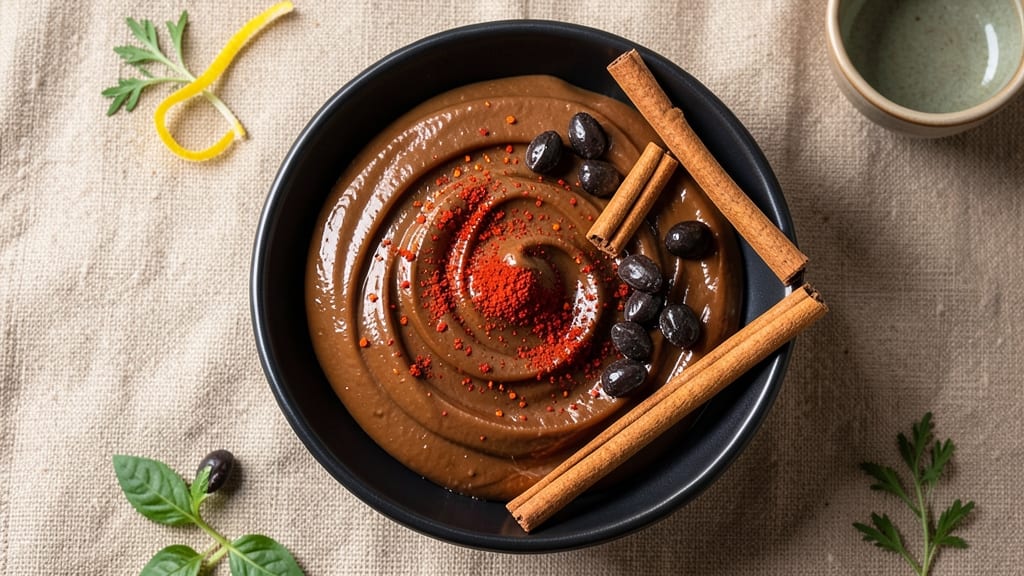
This chili chocolate truffle recipe delivers a sophisticated dessert that balances bold heat with rich chocolate in every bite. The secret lies in carefully calibrated spices—just enough chili powder to add depth without overpowering the velvety cocoa base.
I developed this recipe after years of experimenting with spiced chocolates, and the result is a dessert that feels indulgent yet surprisingly balanced.
The process is simpler than it sounds: melt dark chocolate with heavy cream, then fold in spices like cinnamon, cayenne, and a pinch of chili powder.
Once chilled, the mixture rolls into smooth, glossy truffles that can be coated in cocoa powder, crushed nuts, or even flaky sea salt for contrast. The key is patience—letting the flavors meld during chilling ensures each bite delivers perfect harmony between sweet and spicy.
What makes these truffles special is their versatility. They work as an elegant after-dinner treat, a holiday gift, or even a festive centerpiece for dessert tables. The heat level is customizable—reduce the chili powder for milder flavors or add a pinch of smoked paprika for extra complexity.
Once mastered, this recipe becomes a showstopper that impresses every time.
Store them in an airtight container for up to two weeks, though they rarely last that long. Perfect for special occasions or spontaneous dessert cravings, these truffles prove that bold flavors and elegant presentation go hand in hand. Let’s make them!
Ingredients for chili chocolate truffle
Twelve ingredients transform into twenty-four decadent truffles where spice meets chocolate perfection.
| Ingredient | Amount | Notes |
|---|---|---|
| Extra-Dark Chocolate Bars 🍫 | 12 oz | 70% cocoa or higher, finely chopped |
| Heavy Whipping Cream 🥛 | 1 cup | Full-fat for best texture |
| Unsalted Butter 🧈 | 4 oz | Cut into small cubes |
| Chili Powder 🌶️ | 1 tsp | Adjust for heat preference |
| Ground Cinnamon 🌿 | ½ tsp | Freshly ground preferred |
| Cayenne Pepper 🔥 | ¼ tsp | Pure, not cayenne salt |
| Smoked Paprika 🌶️ | ½ tsp | For depth of flavor |
| Vanilla Extract 🌸 | 1 tsp | Pure Madagascar preferred |
| Cocoa Powder 🍫 | 2 tbsp | Natural, unsweetened |
| Granulated Sugar 🍚 | 2 tbsp | Fine grain preferred |
| Pinch of Salt 🧂 | ⅛ tsp | Enhances all flavors |
| Cocoa Powder Coating 🍫 | ½ cup | For rolling truffles |
| Crushed Hazelnuts 🌰 | ¼ cup | Toasted for extra flavor |
| Flaky Sea Salt 🧂 | 1 tsp | For finishing touch |
The chocolate is non-negotiable—Valrhona or Callebaut bars deliver unmatched depth, but Ghirardelli 70% cocoa works beautifully too. Chop it finely for smooth texture; larger pieces create graininess. Heavy cream and butter must be full-fat for proper emulsification and glossy finish. Whole Foods or specialty grocers stock high-quality cocoa powder, but Hershey’s Special Dark is a reliable store-bought alternative. For spices, Penzeys or bulk bins ensure potency—freshly ground cinnamon and cayenne make all the difference.
No chili powder? Substitute smoked paprika at double the amount, though the flavor profile shifts slightly. Want milder heat? Reduce cayenne to one-eighth teaspoon and add one-quarter teaspoon of ground nutmeg for warmth. The vanilla extract can be swapped for one teaspoon of vanilla bean paste if preferred. For nut-free versions, omit hazelnuts and use crushed pistachios or toasted coconut instead. Always toast nuts before crushing to intensify flavor—five minutes at 350°F does the trick.
Chocolate mixtures brown quickly. Work in batches if needed, and store finished truffles in an airtight container between layers of parchment paper. They keep for two weeks at room temperature or three months refrigerated. For gifting, portion into decorative tins with wax paper between layers. The truffles improve with age as flavors meld—wait at least 24 hours before serving for peak harmony.
Why You'll Love This Recipe
- Five-Ingredient Magic: I swear, this recipe feels like cheating—just melt chocolate, whip cream, and fold in spices. No fancy equipment, no stress, and honestly? It’s the kind of dessert that makes you feel like a pastry chef without the mess.
- Heat Meets Sweet: That chili powder and cinnamon combo is next level—smoky, spicy, and rich all at once. The extra-dark chocolate grounds it, so it’s not too wild, but trust me, the first bite will have you reaching for another.
- Gift-Worthy in Minutes: Between us, these truffles look way more impressive than they are. Roll them in cocoa powder or crushed nuts, and suddenly you’ve got a showstopper for holidays, teacher gifts, or just because. (Yes, even on a Tuesday night.)
- Zero Waste, Maximum Joy: The leftovers? They last. Store them in the fridge for up to a week, or freeze for months—no sad, dried-out chocolate here. And since you’re using pantry staples, it’s also my go-to when I’ve got a sudden craving but no time to shop.
Step-by-step instructions for chili chocolate truffles
Mastering these truffles requires precision in technique and temperature control.
Create a Smooth Chocolate Ganache
In a medium heatproof bowl, combine the 12 oz finely chopped extra-dark chocolate bars and the 4 oz cubed unsalted butter. Place this bowl over a saucepan of simmering water, ensuring the base of the bowl never touches the water. Stir gently until both the chocolate and butter melt completely, creating a glossy, silky ganache. Remove from heat immediately once fully melted—this prevents overheating, which can cause the chocolate to seize.
While still warm, whisk in the 1 cup heavy whipping cream, 2 tbsp granulated sugar, 1 tsp vanilla extract, and the 0.125 tsp pinch of salt. The mixture should be smooth and homogeneous. Let it cool to room temperature while stirring occasionally—this step ensures a stable base for the spice infusion. If a skin forms on the surface, whisk it back into the mixture before proceeding.
Infuse with Spices for Depth of Flavor
Once the ganache has cooled to room temperature, transfer it to a mixing bowl. Using a hand mixer or stand mixer fitted with the whisk attachment, incorporate the 1 tsp chili powder, 0.5 tsp ground cinnamon, 0.25 tsp cayenne pepper, and 0.5 tsp smoked paprika. Mix on low speed for 1-2 minutes to evenly distribute the spices without overheating the mixture. The ganache should take on a rich, deep color and develop an aromatic, slightly spicy scent.
Next, fold in the 2 tbsp cocoa powder using a silicone spatula. This step intensifies the chocolate flavor and adds a velvety texture. The mixture should now be thick but still pipeable. If it’s too thin, chill it for 10-15 minutes to firm up slightly. The ganache should hold its shape when dropped from a spoon but still be pliable enough to roll into truffles.
Shape and Chill the Truffles
Using a piping bag fitted with a ½-inch round tip, pipe the ganache into 1-inch balls onto a parchment-lined baking sheet. Alternatively, use a 1-tablespoon cookie scoop for uniform sizes. Place the truffles 1 inch apart to prevent sticking during chilling. Immediately roll each truffle in the 0.5 cup cocoa powder coating, pressing gently to adhere evenly. This coating not only adds texture but also prevents the truffles from sticking to surfaces.
Refrigerate the truffles for at least 2 hours or until completely firm. This chilling time is critical—it allows the ganache to set properly, ensuring clean slices and a firm texture. For best results, chill them overnight; this enhances the flavor development and makes them easier to handle. Avoid using an ice cream scoop or knife to divide them until they’re fully set.
Finish with Crushed Hazelnuts and Flaky Salt
Once the truffles are fully set, transfer them to a clean work surface. Gently roll each truffle in the 0.25 cup crushed hazelnuts, pressing lightly to ensure even coverage. The hazelnuts add a delightful crunch and nutty contrast to the rich chocolate. Place the truffles back on the parchment-lined sheet and finish by sprinkling each one with a pinch of 1 tsp flaky sea salt. This final touch elevates the flavors, balancing the sweetness with a subtle brininess.
Serve the truffles immediately or store them in an airtight container in the refrigerator for up to 5 days. For an extra-luxurious presentation, dust the truffles with additional cocoa powder just before serving. Each bite should deliver a harmonious blend of molten chocolate, spiced warmth, and crunchy texture, making these truffles a showstopper for any occasion.
Pro Tips For Making Chili Chocolate Truffle
- Temper the Cream: Heat the heavy whipping cream just until it steams—no boiling—then let it cool to room temperature before mixing with melted chocolate. I used to ignore this and ended up with grainy truffles every time; the cream needs to be warm but not hot, or the chocolate will seize up.
- Chop Chocolate Coarse: Roughly chop the extra-dark chocolate into ½-inch chunks instead of shaving it into fine pieces. The texture stays richer, and you avoid the greasy mouthfeel that comes from over-refining it—plus, it melts faster and more evenly in the cream.
- Balance the Chili Heat: Toast the chili powder lightly in a dry pan for 30 seconds before adding it to the cream. This deepens the flavor without adding bitterness, and a pinch of cinnamon (½ teaspoon) helps round out the heat—don’t skip it, or the truffles will taste one-note.
- Chill the Mold: Pop your truffle molds in the freezer for 10 minutes before filling them. The cold surface helps the mixture set faster, and you’ll avoid the messy, sticky edges that happen when the chocolate clings to warm metal—especially with this recipe’s high butter content.
Common mistakes when making great chili chocolate truffle
Overheating the Ganache
Chocolate is temperamental—once it hits 118°F or higher, it can seize or develop a grainy texture. I’ve ruined batches by leaving the ganache too long over simmering water. Always remove it from heat the moment the chocolate and butter fully melt, then cool to room temperature before adding spices.
If you’re in a hurry, transfer the bowl to an ice bath to speed up cooling while stirring constantly. 🌡️
Uneven Spice Distribution
The spices must blend seamlessly, not settle at the bottom. I’ve seen truffles where the first bite was mild and the last bite was fiery—this happens when you don’t mix long enough. Use a hand mixer on low speed for 2-3 minutes to ensure the spices are fully incorporated.
For extra insurance, fold in the cocoa powder last with a spatula to create a ribbon effect that guarantees even distribution.
Skipping the Chill Time
Rushing the 2-hour chill is a rookie mistake. Truffles shaped too soon will be too soft to handle, leading to messy rolling and uneven coatings. I once tried serving them after just 30 minutes—they were a disaster.
The ganache needs time to firm up so it holds its shape when rolled. If you’re short on time, pop them in the freezer for 15 minutes to speed up the process.
Wrong Coating Technique
Rolling truffles in cocoa powder too quickly or not pressing firmly enough results in patchy, uneven coverage. Dip each truffle into the cocoa powder, then roll it on parchment paper to press the coating into place.
I like to use a fine-mesh sieve to dust extra cocoa powder over the rolled truffles for a professional finish. This step isn’t just for looks—it prevents sticking and adds that signature velvety texture. 🍫
Using Low-Quality Chocolate
Cheap chocolate with a high milk fat content or low cocoa percentage will never deliver the same depth of flavor. I’ve tested this recipe with store-brand chocolate, and while it works, the result lacks the complexity and richness of high-quality bars like Valrhona or Callebaut.
If you’re on a budget, Ghirardelli 70% cocoa is a reliable mid-range option. Always chop the chocolate finely to avoid graininess in the final truffles.
Overmixing the Ganache
Once the spices are incorporated, overmixing introduces air bubbles that can cause the truffles to collapse or develop a rough texture. After folding in the cocoa powder, mix just until combined—about 10-15 strokes with a spatula.
Overworking the mixture also increases the risk of overheating, which brings us back to our first mistake. The goal is a smooth, thick, but still pipeable consistency. ✨
Nutrition facts
Frequently asked questions
Can I make these truffles dairy-free?
Replace the heavy cream with full-fat coconut cream and use vegan dark chocolate bars (70% cocoa or higher). For butter, substitute with vegan butter or coconut oil. The texture may be slightly denser, but the flavor remains rich. Chill the mixture for 3-4 hours to ensure proper firming.
How do I adjust the heat level?
The recipe balances sweetness and spice perfectly, but you can tweak it. For milder heat, reduce the cayenne to one-eighth teaspoon and add one-quarter teaspoon of ground nutmeg instead. For extra kick, increase the chili powder to 1.5 teaspoons and add a pinch of chipotle powder for smoky depth. Always taste the ganache before shaping!
What’s the best way to store these truffles?
Keep them in an airtight container between layers of parchment paper. They’ll stay fresh for two weeks at room temperature or three months refrigerated. For gifting, place them in decorative tins with wax paper between layers. Avoid freezing—they soften and lose their texture when thawed.
Can I use white chocolate instead of dark?
Not recommended! White chocolate lacks the deep cocoa flavor needed to balance the spices. If you must use it, mix half white and half dark chocolate (70% cocoa) to maintain richness. The ganache will be sweeter, so reduce the sugar to 1 tablespoon. The texture may also be less stable, so chill for 3-4 hours before rolling.
How do I make these truffles nut-free?
Skip the hazelnuts and use toasted coconut flakes or crushed pretzels for coating instead. For extra crunch, roll them in freeze-dried raspberries or crushed graham crackers. The key is to maintain a textural contrast—just ensure the coating is finely crushed to avoid sharp edges.