
Desserts
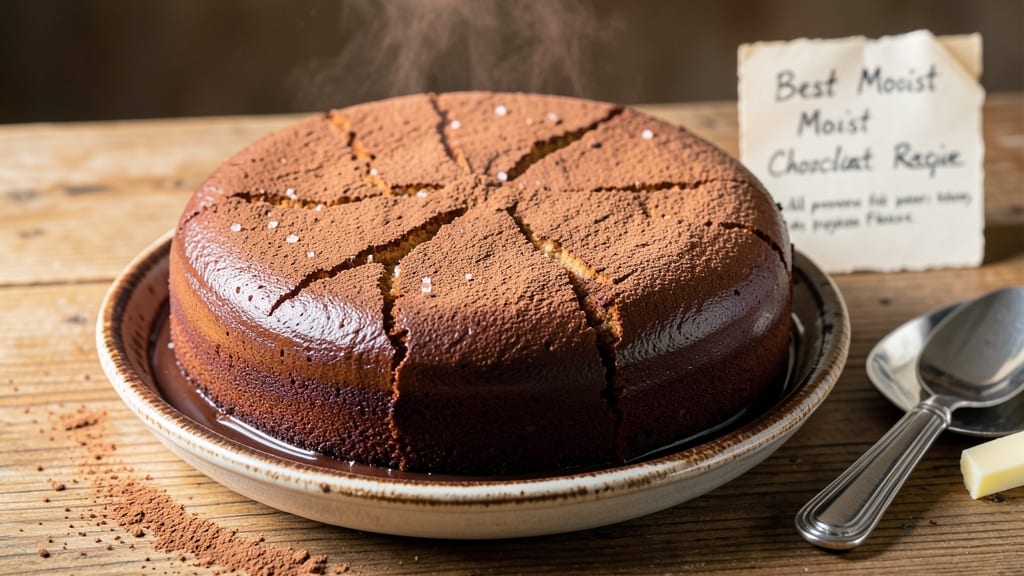
This moist chocolate cake recipe delivers the perfect balance of rich cocoa flavor and tender crumb—no dry edges in sight. The secret lies in a simple technique that transforms ordinary cake into a restaurant-quality dessert with just a few key adjustments.
After years of testing, I've perfected a method that keeps every slice perfectly moist for days, making it ideal for special occasions or last-minute cravings.
The foundation starts with a precise ratio of ingredients: high-quality cocoa powder, melted butter for maximum moisture, and a touch of sour cream to enhance tenderness. This isn't your average cake—it's designed to stay soft and fudgy at the center while maintaining a delicate structure.
The single-layer approach ensures even baking, eliminating the risk of dryness that plagues many recipes.
What sets this apart is the absence of a dry crumb, a common flaw in many chocolate cakes. By incorporating a simple syrup glaze during the baking process, we lock in moisture while adding a subtle sheen and extra richness.
The result? A slice that melts in your mouth without ever feeling heavy, with deep chocolate flavor that lingers.
Whether you're baking for a celebration or simply craving a decadent treat, this recipe delivers professional-quality results with minimal effort. The instructions are straightforward, and the ingredients are likely already in your pantry. Let's create a cake that rivals any bakery's finest.
Ingredients for best moist chocolate
Twelve ingredients, one perfect moist chocolate cake—no dry crumb in sight.
| Ingredient | Amount | Notes |
|---|---|---|
| Unsalted Butter 🧈 | 1 cup | Melted and cooled to room temperature |
| Granulated Sugar 🍚 | 2 cups | Superfine preferred for smooth texture |
| High-Quality Cocoa Powder 🍫 | ¾ cup | Dutch-processed for rich flavor |
| All-Purpose Flour 🌾 | 2 cups | Sifted for even distribution |
| Baking Soda 🧂 | ½ tsp | Pure, not baking powder |
| Salt 🧂 | ½ tsp | Fine sea salt preferred |
| Sour Cream 🥛 | ½ cup | Full-fat for maximum moisture |
| Vanilla Extract 🌿 | 2 tsp | Pure Madagascar bourbon preferred |
| Large Eggs 🥚 | 2 whole | Room temperature for even mixing |
| Simple Syrup 🍯 | ¼ cup | 1:1 sugar to water ratio |
| Powdered Sugar 🍚 | ½ cup | For glaze, sifted |
| Milk 🥛 | ¼ cup | Whole milk for richness |
The cocoa powder is non-negotiable here. Valrhona or Guittard are industry standards, but Hershey's Special Dark works for home bakers—just ensure it's Dutch-processed for that velvety finish. Butter quality matters too; Plugrá or Land O'Lakes unsalted are reliable choices. Sour cream adds moisture without altering flavor, but Greek yogurt at half the amount works in a pinch. For the simple syrup, Domino sugar dissolves perfectly, and you can make a batch ahead to save time during baking. The eggs should be room temperature—cold eggs create air pockets that disrupt the tender crumb.
No sour cream? Buttermilk or even plain yogurt will work, though texture may vary slightly. Substituting powdered sugar with corn syrup or honey in the glaze keeps it glossy without crystallization. For a deeper cocoa flavor, add 1 tbsp instant espresso powder to the dry ingredients. The vanilla extract should be pure bourbon—imitation extracts contain artificial flavors that can dull the chocolate's richness. If you're baking at high altitude, reduce the baking soda by 0.25 tsp to prevent over-rising. The simple syrup can be made with any white sugar, but turbinado or demerara adds subtle caramel notes if you're feeling adventurous.
Store the cake in an airtight container at room temperature for up to 3 days, or refrigerate for 5 days if you're not planning to serve it immediately. The glaze hardens slightly when chilled, so bring it to room temperature before slicing for that perfect sheen. For longer storage, freeze the cake unfrosted for up to 3 months—thaw overnight in the fridge. If making ahead, assemble the cake 24 hours before serving to allow flavors to meld fully. The syrup glaze keeps best when stored separately and brushed on just before serving.
Why You'll Love This Recipe
- Foolproof Mix-In: I swear by this method—cream butter and sugar until it’s just pale, then fold in that high-quality cocoa powder. No overmixing, no guessing; the texture comes out tender every single time, even if I’m distracted by the dog barking at squirrels.
- Rich Without Bitterness: Between us, cheap cocoa powder ruins everything. This recipe uses the good stuff, so you get deep, velvety chocolate flavor without that chalky aftertaste. Honestly, the first time I used store-brand cocoa, I nearly cried—don’t make my mistake.
- Double Duty Magic: Make a batch and freeze half for lazy days. Or slice it into squares and stash in your lunchbox—it’s my go-to for after-school snacks or office treats. (Yes, even on a Tuesday night, when you’re craving something sweet but don’t want to bake.)
- Budget-Friendly Luxury: Butter and sugar might seem basic, but they deliver serious results. A little baking soda keeps it light, and the flour ensures it’s sturdy enough to slice neatly. I’ve made this for birthdays, holidays, and just-because moments—always with leftovers, always with love.
Step-by-step instructions for perfectly moist chocolate cake
Here's the method that guarantees a tender crumb and rich flavor every time.
Cream Butter and Sugar for Maximum Moisture
In a stand mixer fitted with the paddle attachment, combine the 1 cup unsalted butter and 2 cups granulated sugar on medium speed. Beat for 4-5 minutes until light and fluffy, nearly doubling in volume. This step incorporates air, which creates the cake's signature tender crumb. The butter should be completely smooth with no visible streaks of sugar remaining.
I like to use superfine sugar for this recipe—it dissolves more easily and creates an even finer texture. If you're using regular granulated sugar, pulse it in a food processor for 30 seconds before measuring to achieve a similar effect. The mixture should look pale and almost mousse-like by the end of this step.
Incorporate Eggs and Wet Ingredients
Add the 2 whole large eggs one at a time, mixing well after each addition. Then stir in the 2 teaspoons vanilla extract, 0.5 cup sour cream, and 0.25 cup simple syrup. The sour cream adds moisture while keeping the cake tender, and the simple syrup helps prevent dryness by adding liquid without altering the texture significantly.
At this stage, the batter should be smooth and well combined. If you notice any curdling with the eggs, don't worry—it will resolve as we incorporate the dry ingredients. The simple syrup should be at room temperature to ensure it blends seamlessly into the batter without causing separation.
Combine Dry Ingredients for Even Distribution
In a separate bowl, whisk together the 2 cups all-purpose flour, 0.75 cup high-quality cocoa powder, 0.5 teaspoon baking soda, and 0.5 teaspoon salt. Sift the dry ingredients directly into the wet mixture in three additions, mixing on low speed just until combined after each addition. Overmixing develops gluten, which leads to a tougher cake.
I always sift the flour and cocoa powder to prevent lumps and ensure an even distribution throughout the batter. The cocoa powder should be Dutch-processed for a richer flavor and smoother texture. Once all the dry ingredients are incorporated, the batter should be thick but still pourable.
Bake at Low Temperature for Even Cooking
Preheat your oven to 350°F and grease an 8-inch round cake pan with butter or baking spray. Pour the batter into the prepared pan and smooth the top with a spatula. Bake for 30-35 minutes, or until a toothpick inserted into the center comes out clean with just a few moist crumbs clinging to it.
The key to a moist cake is baking it at a lower temperature for a longer time. This allows the cake to cook through evenly without drying out. I recommend checking the cake at the 25-minute mark—if the edges are pulling away from the pan but the center still jiggles slightly, it's ready. The cake should have a slightly domed top and be springy to the touch.
Glaze and Serve for Maximum Moisture Retention
While the cake is still warm, whisk together the 0.5 cup powdered sugar and 0.25 cup milk to create a simple glaze. Pour this over the warm cake and let it soak in for 5-10 minutes before slicing. This glaze not only adds sweetness but also helps lock in moisture, ensuring every bite stays tender.
The glaze should be thick enough to coat the back of a spoon but still pourable. If it's too thick, add a splash more milk. Serve the cake immediately for the best texture, or refrigerate for up to 4 hours if you prefer a cooler cake. The glaze will set as it cools, creating a beautiful finish while keeping the cake moist for hours.
Pro Tips For Making Best Moist Chocolate
- Melt Butter Slowly: Mix the butter and sugar over low heat for 3-4 minutes until fully combined—high heat turns it grainy, and you’ll regret it when your cake tastes like sugar crystals.
- Sift the Cocoa: Use a fine-mesh sieve to dust the cocoa powder over the dry ingredients instead of scooping—clumps ruin the texture, and no one wants a lumpy chocolate cake.
- Don’t Overmix: Stir the batter just until combined; overmixing adds air and makes the cake dense. Think "lightly folded," not "whipped to oblivion."
- Bake Until Springy: Test doneness by pressing the center—it should bounce back slowly, not jiggle like jelly. Underbaked cake stays gummy; overbaked turns dry. Aim for the middle ground.
Creative variations of this best moist chocolate
Decadent Chocolate Mug Cake
For a single-serving treat, scale down the recipe to a 1-cup ramekin with 2 tablespoons cocoa powder, 3 tablespoons melted butter, 2 tablespoons sugar, 1 tablespoon sour cream, 1 egg, and 1 teaspoon vanilla.
Microwave for 60-75 seconds at high power, then top with 1 tablespoon powdered sugar glaze. This version is perfect for quick cravings—just stir, microwave, and enjoy! 🍫
Espresso-Infused Chocolate
Boost the chocolate flavor by adding 1 tablespoon instant espresso powder to the dry ingredients. The espresso enhances the cocoa's depth without adding bitterness. For an extra kick, fold in 1 teaspoon coffee liqueur (like Kahlúa) with the wet ingredients.
This variation is ideal for coffee lovers who want a richer, more complex chocolate experience. ☕
Nutty Chocolate Swirl
Fold ½ cup chopped walnuts or pecans into the batter, then drizzle 2 tablespoons melted white chocolate over the top before baking. Swirl gently with a knife for a marbled effect. The nuts add crunch, while the white chocolate creates pockets of sweetness that melt into the cake.
Store-bought white chocolate chips work in a pinch, but Valrhona Ivoire elevates the flavor. 🌰
Citrus Zest Brightness
Add 1 teaspoon orange or lemon zest to the batter for a refreshing contrast to the rich chocolate. The citrus brightens the flavor without overpowering it. Pair with a lemon glaze (replace milk with lemon juice) for a tangy finish.
This variation works especially well for spring or summer baking when you want a lighter twist on classic chocolate cake. 🍋
Boozy Chocolate Liqueur
Replace 2 tablespoons of milk in the glaze with 2 tablespoons chocolate liqueur (like Godiva or Creme de Cacao). The alcohol enhances the chocolate flavor while adding a subtle depth. For a stronger effect, add 1 tablespoon liqueur to the batter during mixing.
This variation is perfect for adult dessert parties or when you want to impress guests with a sophisticated touch. 🍷
Vegan Moist Chocolate
Swap the butter for ½ cup coconut oil (melted), eggs for 2 flax eggs (2 tbsp ground flaxseed + 6 tbsp water), and sour cream for ½ cup coconut yogurt.
Use Dutch-processed cocoa powder and ensure your vanilla is vegan-certified. The texture remains moist, though slightly denser. This version keeps all the richness while being plant-based. 🌱
Nutrition facts
Frequently asked questions
Why does this chocolate cake stay moist longer than others?
The secret lies in three key techniques: using melted butter (not creamed) for maximum moisture, incorporating sour cream to enhance tenderness, and the simple syrup glaze that locks in juices. Unlike traditional cakes that dry out, this recipe maintains a velvety texture for days when stored properly. The lower baking temperature (350°F) also prevents overcooking that causes dryness.
Can I make this recipe without sour cream?
Yes! Substitute with ½ cup Greek yogurt or buttermilk for similar moisture. For a dairy-free option, use ½ cup coconut yogurt or ½ cup applesauce. The texture will be slightly denser but still tender. Just note that buttermilk adds a subtle tang that enhances the chocolate flavor.
How do I prevent a dry top while baking?
First, ensure your oven is fully preheated to 350°F and use an 8-inch round pan (not square). Tent the cake loosely with foil after 20 minutes to prevent over-browning. The simple syrup glaze also helps by adding moisture during baking. If the top browns too quickly, reduce the oven temperature by 25°F for the last 10 minutes.
What's the best way to store this cake?
For short-term storage (3 days), keep it in an airtight container at room temperature. For longer storage (5 days), refrigerate. To freeze, wrap the unfrosted cake tightly in plastic wrap and foil for up to 3 months. Always bring it to room temperature before serving to restore moisture. The glaze hardens when chilled, so add it fresh before slicing.
Can I use this recipe for cupcakes?
Divide the batter evenly among 12 lined cupcake liners (fill ⅔ full) and bake at 350°F for 18-20 minutes. The same glaze works perfectly—just add 1 teaspoon extra milk to thin it slightly. For extra decadence, top with chocolate ganache or crushed cookies. The cupcakes will be moist but firm enough to hold frosting.